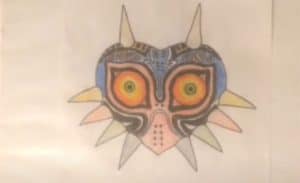
How to Draw Majoras Mask from The Legend of Zelda with this how-to video and step-by-step drawing instructions.

Please see the drawing tutorial in the video below
You can refer to the simple step-by-step drawing guide below
Step 1
The first thing you will do is draw a simple heart shape like you see here. On each of the faces below, you’ll draw four spikes and two horns. Inside the heart draw guide lines on the face.
Step 2
Now you will outline the liner to form the eye, and then the swirl like the cheek line as you see here. The lines under the eyes should be doubled.
Step 3
Outline completely the shape of the cat’s eyes, then draw the eyeball and pupil. Draw a neat little design between the eyes like you see here, then draw the nostrils and a line between the cheeks.
Step 4
Draw the pointed shape of the horns and then add some neat looking triangular designs above the eyebrows. You are trying to capture a tribal face in a mask. Add some dots above and below, and move on to the next step.
Step 5
For the final drawing step, all you have to do is draw sharp horns on each side of the heart mask. There are four horns on each side. Erase the lines and shapes that you drew in step one.
Step 6
You are 100% done. All you have to do is grab your crayons, markers or colorful crayons and head to this popular object coloring town from The Legend of Zelda: Majora’s Mask.


