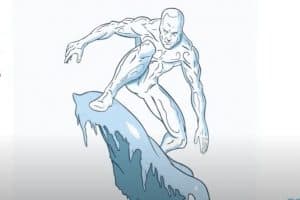
How to Draw Iceman easy with this how-to video and step-by-step drawing instructions. Cartoon Drawing tutorials for beginners and kids.

Please see the drawing tutorial in the video below
You can refer to the simple step-by-step drawing guide below
Step 1
Following a good old tradition, we will begin drawing with the construction of a stickman. The character’s arms and legs are stretched forward and the chin pressed against the body like a boxer.
Step 2
Let’s make our stikmen richer. Draw a strong rounded back line to connect the neck and pelvis. Then draw the contours of the arms and legs. Do not make the legs and arms too muscular and bulky. Don’t forget that we are drawing a teenager.
Step 3
Now we will draw an icy path. You should follow the rules of perspective: secluded areas of the road will look very small. But the road that Bobby stood on must be very large. Don’t forget to pull out the tape that Bobby shot to widen his path ahead.
Step 4
It will be a very short and simple step. All you need here is to outline the facial features using short strokes.
Step 5
From this step, we begin to draw the details that we will see in the final version of the drawing. And we will draw facial features in the final version. There are some interesting things on Bobby’s face: His eyes have no pupils; Our character clenched his teeth very tightly; He is quite similar to Dr. Manhattan (DC comics) and Silver Surfer (Marvel Universe).
Step 6
We continue the drawing lesson in which we tell you how to draw Iceman. Now we will draw the arms in their final view. Please read about the basics of the hand in this drawing lesson (step 2). And say “thank you” to Iceman because he shot the iceberg that covered his palm. Usually, palm painting is a very difficult job.
Step 7
Now we will draw the outline of the ice ray and the legs. Don’t forget to draw smoke outlines around the hand. And legs – it’s really very easy. Just erase the excess lines and outline the contours of the knee.
Step 8
Draw lines that will cover the icy path. These lines should be straight or just slightly curved. There is only one exception to this rule: the line at the turn of the road must have a very strong bend. As you have noticed, the curves inside the contour repeat the bends of the line itself.
Step 9
In the last step we will draw small shadows, more precisely, that are not shadows, but just areas covered by very slight bloom. We love comic books and love to draw different characters from different manga, and we want all our readers to be able to draw like real manga artists.
So visit our category called “Comics” to improve your drawing skills.


