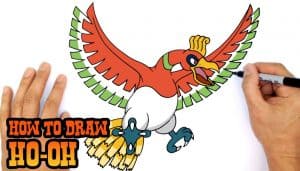
How To Draw Ho-Oh Pokemon easy with this how-to video and step-by-step drawing instructions. Pokemon drawing tutorial for beginners and kids.

Please see the drawing tutorial in the video below
You can refer to the simple step-by-step drawing guide below
Step 1
To start Ho-Oh, we first need to draw two circles — one larger than the other. These circles will serve as guides for Ho-Oh’s head and body.
Step 2
Next, draw two lines connecting the circles together to form Ho-Oh’s neck, and draw a curved crest on top of his head.
Step 3
Erase your overlapping lines and draw the outline of Ho-Oh’s beak sitting below its crest.
Step 4
Next, draw the inside of Ho-Oh’s beak, including a long tongue sticking out of his mouth.
Step 5
Draw two ovals to create the outline of Ho-Oh’s eyes.
Step 6
Inside Ho-Oh’s eye, draw two more circles to form the iris and pupil.
Step 7
Next, draw two long lines extending from the base of Ho-Oh’s neck and reaching over his head to form the outer edge of the wings.
Step 8
Draw the outer edge of Ho-Oh’s wings while also creating the inner feathers.
Step 9
Draw an extra layer of feathers on each of Ho-Oh’s wings.
Step 10
Next, draw Ho-Oh’s upper legs as two ovals near his lower body.
Step 11
Draw a large foot attached to each of the Ho-Oh’s ovals. Each foot should have four toes, three in front and one in the back.
Step 12
Next, draw a sharp claw at the end of each Ho-Oh’s toe.
Step 13
Just like his wings, Ho-Oh’s tail is made of two layers of feathers. Draw the first layer attached to the back of his body, facing outwards in all directions.
Step 14
Finally, draw an extra layer of fur on the back of Ho-Oh’s body to complete his tail.
Step 15
Finally, give Ho-Oh some color. Ho-Oh is one of the most colorful pokemon in the series — a bright red body, purple feet, yellow and green feathers, and a white belly. I hope you enjoyed learning how to draw Ho-Oh with me. If you did, be sure to share this tutorial on social media and stop by for more! Happy drawing!


