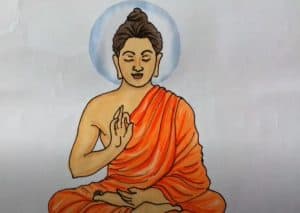
How to Draw Buddha easy with this how-to video and step-by-step drawing instructions. Easy drawing tutorial for beginners and kids.

Please see the drawing tutorial in the video below
You can refer to the simple step-by-step drawing guide below
Step 1
Start by drawing an oval. This will help you shape the top of the Buddha’s head.
Step 2
Underneath the oval, surround another egg shape using a long, curved line. This forms the lower part of the Buddha’s face.
Step 3
Delete guides between the two shapes.
Step 4
Sketches in Buddha’s hair. To do so, draw short, curves that connect the outside of ovals, surrounding the area where the two ovals meet. Then, draw a long curve connecting the two points inside the figure. Note that the line has a loose shape like the letter “M.”
Step 5
Draw a bun on top of Buddha’s head. Use a curve to surround an oval that disappears behind the top of the head.
Step 6
Draw the ears. Cover the ear using a set of overlapping curves. Delete the instructions if needed. In the ear, there is a narrow drop of water.
Step 7
Hair detail and texture. Do so by drawing small circles of different sizes. According to some legends, this texture is not hair at all, but small snails covering the Buddha’s head to keep him cool while meditating in the hot sun.
Step 8
Stretch the two curves down from the top, forming the neck. Note how the curves outward in opposite directions. Contour detailing of the throat using a short and curved line.
Step 9
Drawing Buddha’s face. Fill in two thick, curved shapes to form eyebrows. Underneath the eyebrows, surround each eyelid using two curves. Make the bottom line bold. Stretch a pair of lines to form the nose and complete the shape using two curves. Use three curves to surround the lips, and another small curve below the mouth to give depth to the chin.
Step 10
Further complete the body and limbs of the Buddha. And color Buddha. The Buddha image can be bright gold, or it can be stone – gray, brown, or even covered with green moss.

