How To Draw Betty Boop easy with this how-to video and step-by-step drawing instructions. How to draw cartoons for beginners and kids.
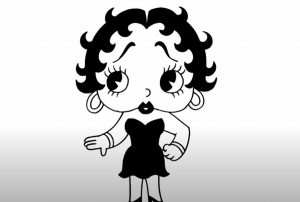
Please see the drawing tutorial in the video below
You can refer to the simple step-by-step drawing guide below
Step 1
To start Betty Boop, first draw a big heart… Almost like a piece of bread.
This shape will be her entire head and hair combined.
Step 2
Next, draw two lines extending from the end of Betty’s head. These lines will become her legs and as you can see from the image on the left, they should be twice the height of Betty’s head.
Step 3
Make Betty Boop’s left leg. Repeat the same process, following the red lines to create Betty’s remaining leg. Erase the principles in Betty’s legs and you’ll be able to see her start to pull together.
Step 4
Drawing two arms will also be used to connect Betty Boop’s head and body together.
Step 5
Betty has no neck; rather, the lower part of her head rests directly on her shoulder.
Step 6
Give Betty a hand with all five fingers, (this isn’t common in cartoons) and a bracelet around her wrist to make a bracelet.
Repeat the previous process to give Betty the other hand and follow the red lines to draw her dress.
Step 7
Now Betty Boop’s trademark curly hairstyle. Add a few more curls around the contour of her head and draw more curls near the center of her head to create Betty’s face.
Step 8
Draw Betty Boop’s simple oval eyes and give her a thick, upward brow.
Step 9
By now Betty Boop has pretty much perfected it. All that’s left to do is paint her really small lips and some lashes.
That’s it! Color Betty and enjoy!
