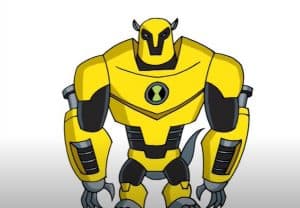
How to Draw Armodrillo from Ben 10 easy with this how-to video and step-by-step drawing instructions. Cartoon drawings for beginners and kids.
Please see the drawing tutorial in the video below
You can refer to the simple step-by-step drawing guide below
Step 1
Since this character’s pose will be from a top-down perspective, Armorrillo shouldn’t be too difficult to draw. Start with a small circle for his head, and then add a vertical line in the middle. You will then draw an oval circle around the shape you just drew that will be for the upper body. Finally, add the guides for the arms.
Step 2
You will now begin to outline the structural shape of his face and/or head. Once done, do the same for his body. This should be a relatively easy lesson to follow since you’re not drawing Armodrillo’s entire body.
Step 3
Draw and color on his mask and then add the lining detailing his armored body. Next, draw the initial shape of the shoulder, and then draw the Omnitrix logo or emblem on his chest like so.
Step 4
Now it’s time to start drawing his big arms. His plated armor makes his arms look extremely powerful. You have to convey this by drawing the arms boldly and neatly. Take your time, don’t rush. After the arms are drawn, you can add details like the vent system at the top of the forearm and the drill pieces that make up Armodrillo’s elbows.
Step 5
For the final drawing, all you have to do is draw his giant nails like hands, then his paws and tail. Isn’t it weird that an alien-looking robot has a tail? Anyhow, once all of this is done, you can start erasing all the principles and shapes that you drew in step one.
Step 6
Finally, a great drawing of this brand new Ben 10 Ultimate Alien has been done. All you need to do now is color him. I hope you enjoyed this tutorial and if you want to learn how to draw again just come back and join me for another fun lesson.
