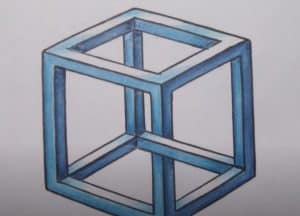
How to draw an impossible cube easy with this how-to video and step-by-step drawing instructions. 3D drawing tutorial for beginners and everyone.

Please see the drawing tutorial in the video below
You can refer to the simple step-by-step drawing guide below
Step 1
Start by drawing three vertical lines. The lines must be of equal length, but the middle line must be placed lower than the other lines. Then, connect the lines at the bottom with straight lines. This forms the sides and bottom edges of the cube.
Step 2
Draw a quadrilateral or quadrilateral at the top of the cube.
Step 3
Next, the top panel details the cube. Draw a smaller square in the top side of the cube. Stretch a short line from the top corner of this square. Then, draw two lines extending from this line, parallel to the sides of the square.
Step 4
Draw a square inside one of the sides of the cube.
Step 5
Draw a square inside the panel on the other side of the cube.
Step 6
Draw short lines extending from opposite corners of squares. Then, draw two lines extending from each short line. These lines should be parallel to the sides of the square.
Step 7
Spans three straight segments from the bottom left corner of the cube. Then, stretch three straight segments from the bottom right corner of the cube. Allow the lower and middle lines to meet. Then join the ends of the straight segments, forming rectangles.
Step 8
Delete the guides from the shapes drawn in the previous step
Step 9
Draw the last side of the impossible cube. Draw three parallel lines connecting the top and bottom corners of the cube.
Step 10
Coloring your impossible cubes.


