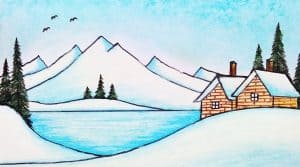
How To Draw A Winter Scene easy with this how-to video and step-by-step drawing instructions. Landscape drawing for beginners and everyone.
Please see the drawing tutorial in the video below
You can refer to the simple step-by-step drawing guide below
Step 1
Start with some basic tutorials and shapes starting with the structure of the house or cottage. Next, draw lines of different shapes for the landscape and then draw guide lines for the two trees.
Step 2
Now you will start sketching the roof of the house and then add more details to the landscape lining. Next, draw the initial lining for the fence and then start sketching some winter tree limbs.
Step 3
For step three, you will draw out all the pine trees in the background as you see here, and then draw the windows and doors of the cottage. Also, sketch some snow on the roof and then sketch two more winter trees.
Step 4
You will finish the shape and style of the fence selected in white and then paint some details in the snow such as deer hooves and dense piles of snow. Sketch the stumps and then detail the frozen pond.
Step 5
You will sketch in several prints in front of the snowy path in front of the house and then sketch the broken ice patches on the surface of the pond. Erase the principles and shapes you can see to clean up your winter scene.
Step 6
This is what your winter landscape will look like when you’re done. Color in and you’ve just learned “how to draw winter scenes step by step”.
