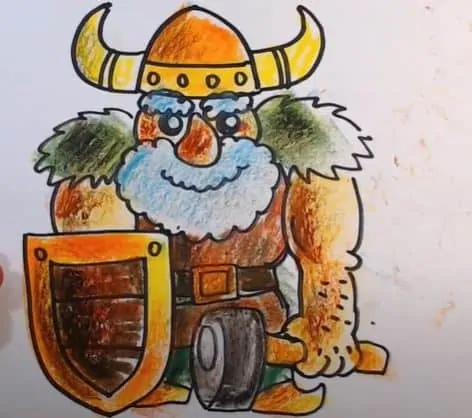
How to draw a Viking easy with this how-to video and step-by-step drawing instructions. How to draw cartoons for beginners and kids.
Please see the drawing tutorial in the video below
You can refer to the simple step-by-step drawing guide below
Step 1
Start off by drawing a circle. This will help you form animated Viking heads. In the circle, draw two smaller circles to form the eyes. In each eye, draw and shade an even smaller circle to denote the pupil.
Step 2
See details of the “ face ”. Use a “C” shaped line to surround one ear on each side of the head. Use overlapping curves to add detail to each ear. Take a curve around the small half circle on top of the head and draw a pair of brow lines. Cover the small circles on the strip, completing the metal helmet. Draw a vertical line between the eyes with an inverted “C” line to create a funny nose.
Step 3
Erase the upper part of the eyes and replace them with shaded diagonal rectangles to give the Vikings an angry look. Uses a long and curved line to surround an unusually rounded shape below the nose, forming the mouth. Use the curves to outline the teeth and tongue in the mouth. Then stretch the pairs of curves above the ears and let them meet in sharp points, forming the characteristic Viking horns.
Step 4
Erase the lower part of the circle (the head part) and replace it with a long Viking beard. Sketch the beard using overlapping curves and a “U” shape. Wrap the horn with curves.
Step 5
Stretch a few elongated curves underneath the beard and fold them in half to meet at a point in the middle. Draw a short horizontal line where the lines intersect. This outlines the “ body, legs, and feet ”.
Step 6
Use curves that meet in points to encircle the quasi-triangular shapes of Viking shoulder armor. Circle a half circle underneath the beard and connect it to the sides of the body by pair lines, forming a belt ring. Cover small circles on the belt. Draw the bottom of the garment or tunic using a curve cut off by small triangular points. Use lines to mark the upper part of the boots.
Step 7
Draw large, feathery, “ furry ” arms. Stretch a pair of curves and length from each shoulder. Use overlapping “U”-shaped lines to form fingers. Use a short, curved line to close the nail at the tip of each finger. Then use the curves to indicate the bristles on the arm.
Step 8
Draw a series of “U” shaped lines below each shoulder, erasing as needed. This forms the sleeves of a fur suit. Draw an oval on one hand, erase as needed, forming the chappe or the cross of a sword.
Step 9
Draw a short line across the diagonal barrier and extend the long curves from each end. Connect them at the end by two lines that meet at a point. Delete as needed. Draw a line down the middle of the blade and use a curve to surround the bomb, visible right behind the arm. Coloring your Viking cartoon.