How to Draw A Rope easy with this how-to video and step-by-step drawing instructions. Easy drawing tutorial for beginners and kids.
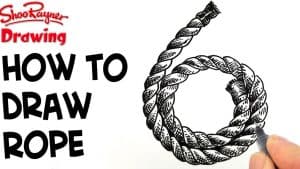
Please see the drawing tutorial in the video below
You can refer to the simple step-by-step drawing guide below
Step 1
The trick to learning how to draw a rope is to know that the rope is made up of many smaller segments. That is something that we will keep in mind as we make this guide.
As you can see in the tutorial, the rope will be in the shape of a cookie. If you want to make things easier for yourself, you can start by drawing a line with a pencil in the shape the rope will take and then drawing over it.
Now we will draw the reverse side of the rope, where it overlaps itself to form the loop.
You will do this by drawing many smaller segments to form the rope, as shown in the reference image. This is a drawing where patience will be your most useful tool, so remember to take it slow as you draw!
Step 2 – Draw the first loop of the rope
For this part of your rope drawing, we will continue to draw smaller segments to build up some more rope.
We will focus on the small area that serves as the first loop on the upper left side of the rope. Once you’ve got that out of the way, we’re ready to move on!
Step 3 – Now, complete the loop of the rope
We’ll be completing the first loop of the rope in this third step of the how to draw a rope tutorial.
To do this, simply stretch the entire sections of the rope over the inside of the rope shape. If that sounds confusing, the reference pictures will guide you as you draw!
When you’ve completed this step, you’ll have drawn the first full loop on the rope.
Step 4 – Next, draw the second loop of the rope
Your next two rope steps will be to do the second loop of the rope. As we mentioned in the first step, when finished, your rope will have a little shape.
To do this, you will essentially mirror everything that you did in the previous steps. For this section, you will continue to extend the center of the rope up to the tip of the right loop.
Then we will be able to complete it in the next step!
Step 5 – Now you can finish the second loop
Time to finish this rope loop before the final coloring step of this rope drawing tutorial!
All you need to do for this step is keep the loop going until you reach the end of the cookie shape we mentioned earlier.
If you’ve used a pencil to draw a guide line in the first place, you can see why it’s such a helpful thing to do! Once you’ve finished drawing the rope, you can erase this pencil line if you’ve used one.
That will take you to the end of the drawing section of the tutorial! It is in
before moving on to the final step, however, you can also add any additional details of your own. There are several things you can do to include your own drawings.
You can stretch the rope even more to create more loops or different loops and shapes. Maybe you could also add some knots or even add something like an anchor to it!
What great ideas can you think of to add to this image?
Step 6 – Finish up your Rope drawing with some colors
The final step of your rope drawing will be to add some awesome colors to make it really come to life.
You might think a rope isn’t something that gives you much freedom in terms of how you can color it, but that’s not necessarily the case!
We used a lighter shade of brown for the rope, and even if you choose a similar color, there are ways you can incorporate some lighter colors.
The best way to add some lighter color to a more muted object like this is with the background. If you have drawn any background elements or other details then you can color them in some variation.
You can also use some bright colors for some of the backgrounds or simply turn it into a bright and cheerful colored rope!
How would you complete this rope drawing with your colors?

