How to Draw Power Ranger with this how-to video and step-by-step drawing instructions. Cartoon drawing tutorials for beginners and kids.
Please see Power Ranger drawing tutorial in the video below
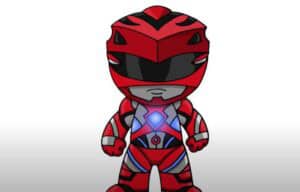
Power Ranger is one of the heroes of the popular TV series of the same name. If you’ve watched this series, then you’ll remember that this hero bravely fought the villains who wanted to destroy the world. The Power Ranger wears a spandex suit and a helmet on his head. Today you will learn how to draw Power Ranger.
In this lesson, the character is shown in chibi style so there are certain proportions when the head is much larger than the body, and the arms and legs are short.
With the help of a simple tutorial you will draw all the elements of this character in turn. Be careful and use the hints at each step to get great results.
Power Ranger Drawing Step by Step
Step 1. Draw the head.
On the head is a helmet. The helmet is rectangular with rounded corners.
Step 2. Describe the body of the torso.
Below the helmet, draw a small body, much smaller in size, add a belt below.
Step 3. Sketch the legs.
Draw the legs with smooth lines.
Step 4. Draw the shoes.
Draw small boots, while the feet rotate in different directions.
Step 5. Add hands.
On the sides of the body draw two gloved hands.
Step 6. Draw the top part of the helmet.
Add elements at the top of the helmet in the form of an animal face. Describe the ears, eyes, and nose.
Step 7. Add details.
With smooth lines, add the rest of the helmet elements, as shown in the example.
Step 8. Clothing details.
Depicts the elements on the chest, gloves and boots.
Step 9. Color the Power Ranger.
You will need red, yellow and gray…
