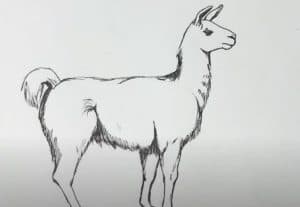
Llama Drawing easy with this how-to video and step-by-step drawing instructions. Easy animals to draw for beginners and everyone.

Please see the drawing tutorial in the video below
You can refer to the simple step-by-step drawing guide below
Step 1
Okay, I know many of you remember how to take this first step, right? Well, you’ll draw a circle for the head and then add guides for the eyes. Next make the shape of the cone like a muzzle. Draw a long diagonal line for the neck and then create an elongated circle for the center of the llama’s body. Then you will create a small egg shape for the back end of the body. Conclude this step with the chi instructions.
Step 2
Okay, as you can see your llama has taken shape. Now you will start sketching the face, head and mouth. Make a small dash for the nostrils and then a small circle for the eyes. You will then create two antenna lines for his ears and then outline the shape of his angry neck and underbelly. Once that’s done, you can start sketching the shape of the hind legs.
Step 3
Okay, as you can see the llama at this point looks more like an animal. You’ll start this step by shaping his jawline, then detailing his eyes and shaping his ears. Next outline the back of the neck and follow that until you reach the tail. Start drawing the front leg and the rest of the back leg.
Step 4
All you will do here is detail the ears and then finish drawing the llama’s legs as shown. Then you will detail the thighs and give him a tail. Before you leave the front leg detail is bent up.
Step 5
As you know, this is your last drawing step and the first thing you will do is start erasing all the guides that you drew in step one. You will then briefly detail the llama’s jaws, lips, and hind legs. Then finish this step by giving the llama some toes.
Step 6
When you’re done your llama will look like the one you see here. All you have to do is color him. That should work for this step-by-step how to draw llama tutorial. Stay tuned for more cool stuff to come.


