How To Draw A Christmas Wreath easy with this how-to video and step-by-step drawing instructions. Drawing for beginners step by step.
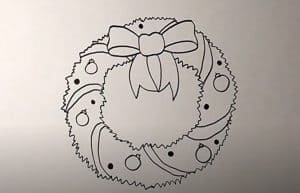
Please see the drawing tutorial in the video below
You can refer to the simple step-by-step drawing guide below
Step 1
In the first step of the tutorial on how to draw a Christmas wreath, we will start with the top of the wreath.
There will be a bow on top of the wreath, and you can start it with a small oval in the center.
Use some curves for the edges of the bow. Then there will be two strands falling from it, as shown in the reference image.
Once this bow is drawn, we will begin to draw the wreath itself. Use some pointed curves to create curved branches that form a circle.
These sharp lines will help make it look like it was made with pins. Draw two smooth lines on each side of the branches to show some ribbons tying them up, and then we can move on to step 2!
Step 2 – Now, draw some more garlands
To continue how to draw this Christmas wreath, the next thing we will do is draw more branches that make up the wreath.
To do this, we’ll use some more pointed, curved lines to make it look like pointed pine needles.
After drawing some more parts like this, we will draw some more ribbons tied around them like you did in the previous step.
That’s all there is to this step, so let’s move on now.
Step 3 – Draw some more parts for the wreath
You are doing a great job in the how to draw Christmas wreath tutorial so far! In this third part, we will continue to expand on what you started in the previous steps.
That means you’ll be drawing some more curved, pointed lines for the branches of the Christmas wreath.
Again, there will be some extra ribbon tying these pieces together where they end up.
There will still be a small gap at the bottom, but don’t worry because we’ll take care of that in the next step of the tutorial!
Step 4 – Next, draw the last part of the Christmas wreath
This step of your Christmas wreath drawing will help you complete the outline. To do this, we will only have one more part of the wreath to draw.
This last part will fill in the empty space you left in the previous step. This will also be a branch section, so again you can use some spikes to paint it with a pine texture.
Once this is drawn, we’ll move on to the fifth step of the tutorial, where you can finish off by adding some awesome decorative elements!
Step 5 – Add the final details to your Christmas wreath drawing
Before you start adding some color to your drawing, we have some final details to add to this step of the Christmas wreath tutorial.
This must be a really fun step, as in this step you’ll be finishing off with some decorations!
In our example image, we drew some small circles throughout the Christmas wreath to start. Then we drew some larger circles with small shapes at the top of each ring for some pretty baubles on the wreath.
Once these details are drawn, you are ready for the final step! Before continuing, you can also change some details or add your own!
Part of the fun of this drawing is that you can take what you’ve learned and use it to create your own unique Christmas wreath.
What would your ideal Christmas wreath look like? You can show us with your incredible drawings!
Step 6 – Finish your Christmas wreath drawing in color
Now it’s time to finish this Christmas wreath drawing with some color! In our reference image, we found some great festive colors.
We used some red and pink for the bow and ribbon sections, then we used some gold for the jewels. Of course, we finished the branches with a nice shade of green for a fresh look.
These are the colors we’ve chosen, but you should definitely use any other colors you like!
Here’s your chance to make your perfect colorful Christmas wreath, so you should really let your creativity flow. What colors and art mediums will you choose for your images?
