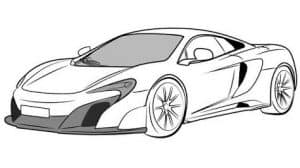
How to draw a mclaren p1 easy with this how-to video and step-by-step drawing instructions. Car drawing by pencil for beginners and everyone.

Please see the drawing tutorial in the video below
You can refer to the simple step-by-step drawing guide below
Step 1
So, we often start drawing lessons about cars with common lines, this McLaren P1 drawing lesson is no exception. Use very light lines to outline the outline like in our example.
Step 2
The McLaren P1 has very unusual headlights and an entire front end. Sketch these unusual headlights and the front end, the contours of the windows and the side mirrors.
Step 3
Now using a semi-oval outline the wheel arches in a semicircle and the wheels themselves in an oval shape. At the back draw the curved spoiler.
Step 4
Here, we start adding the final details, and as always, we’ll start doing this from the front of the car. Draw details in the headlights using lines and circles.
Step 5
We continue to draw the front of our McLaren P1. Carefully draw the bumper lines and place the number plates. As you can see, this car has a lot of curves.
Step 6
Let’s move to the top of our McLaren and start painting the roof. Draw the lines of the front and side windows. Draw the rearview mirror.
Step 7
Draw the rest of our McLaren bodywork. Carefully draw out the wheel arches and the wheels themselves, as in our example.
Step 8
Still a very simple step in which we will need to draw contours. In our example you can see the classic spoked rim, but of course you can draw any other type of rim.
Step-by-step drawing instructions for drawing a McLaren P1. We had a lot of lessons about the fastest cars, such as Lamborghini and Ferrari.


