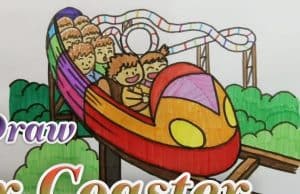
How to Draw A Roller Coaster easy with this how-to video and step-by-step drawing instructions. Simple drawing for kids and everyone.

Please see the drawing tutorial in the video below
You can refer to the simple step-by-step drawing guide below
Step 1
In this roller coaster drawing tutorial, we will draw a roller coaster car with four people sitting in it. For this first step, we will draw the car to start with.
There are several different components to this car, so going slowly and following the instructions closely will be the best way to easily draw this car.
You can use a combination of straight and curved lines to draw the bodywork, and there will be a safety bar at the front.
There will be a space at the top of the car where we will draw people in the next steps.
Step 2 – Start drawing the surroundings for the glider
This second part of your roller coaster drawing will also involve a lot of detail for you to draw, so this is another part where you’ll want to go slow and follow the instructions.
First, you can use some curves for the roller coaster’s path.
These rails will also have vertical descents for the poles holding the overhead rails.
Then we will draw some background details like some big leaves next to the roller coaster. You can also add some details of your own before continuing!
Step 3 – Draw the first person to ride the roller coaster
Now that you have drawn the glider’s car, in the next step of the how to draw glider tutorial we will draw the first person to ride on it.
The first one will be a little girl, and like all riders, she will be drawn in a fun cartoon style.
You can also change the style of the people on the roller coaster if you want.
Step 4 – Now draw another person
In this fourth step of drawing the roller coaster, you will add another person to the picture.
The next person will be a boy. You should also be sure to pull the rails that hold them in place.
Step 5 – Next, draw another kid in the roller coaster
We will continue to draw more children in cars for this step of the how to draw roller coaster tutorial.
This boy will sit in the next row, and he will sit in another area of the car that we will draw in the next step.
There will be another child sitting next to you and you will also draw the starting point of his or her hands in this step.
Step 6 – Now, add the final child and the final details
It’s almost time to add some great color to your roller coaster drawing, but first, we have a few details and elements to add.
As mentioned in the previous step, we are going to draw one more child on the roller coaster.
You’ll also use some curves to create the second car of the coaster she’ll sit on. Once you’ve finished drawing the second car, you can finish with the last kid.
Once you’ve finished drawing that last child, just add some details before you move on.
You can add some background details like trees or mountains, but this is the step where you can also add some details of your own!
You can change the background, make the gliders look different, or add some decoration to the sides of the roller coaster.
These are just a few ideas you can get involved with, so what else can you think of to complete this look?
Step 7 – Finish your roller coaster drawing with some color
The final step of this roller coaster drawing tutorial will be to add some amazing colors to it to complete it.
We used some nice bright colors for our reference image, but keep in mind that this is just a suggestion.
If you like the color we have chosen then you can use it to recolor your own drawing, but you can also change it and combine any color or art medium other that you love!
Make sure you have a lot of fun creating and see what happens!
Your Roller Coaster drawing is done!
That concludes this tutorial on how to draw a roller coaster! We hope that following this tutorial will make the drawing process much easier for you, but we also aim to make it fun.
As long as you follow this guide and take it slow, we know you’ll have a great look!
However, completing this tutorial is not the end of the fun! One way you can go ahead is by adding some of your own.
These can include adding the background, but can also include changing the design of the roller coaster or the kids riding it.
This is your chance to have fun and get creative with it, so we look forward to seeing what you do!
Another way to keep drawing fun is to try one of the many great tutorials we have on our site! We also regularly upload new ones, so be sure to check in often.


