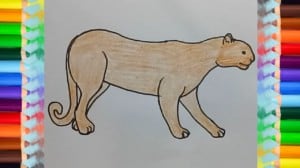
How to draw a puma easy step by step for beginners with this how-to video and step-by-step drawing instructions. Easy animals to draw for children and everyone.

Please see the drawing tutorial in the video below
Step 1
The head will be made of straight lines, curved or indented as needed for the mouth, nose and other parts of the face.
Step 2
To draw a face, create an oval shape for the eyes, a very small triangle for the nose, a single horizontal line for the mouth, and two non-bottom triangles inside the ear.
Step 3
To draw the body, draw a diagonal line with a few collisions from the bottom of the head, and a line with a single wave on the left end will curve up and then around to make ends of the Puma.
Step 4
Draw the front leg by making the two paths go down the leg, which should stick out from the leg. Make lines for the toes. Then draw the bottom of the puma with one line, and add a line to the body to identify the foot. Draw the other front leg like the first, except it will come out diagonally and right instead of going straight down.
Step 5
Draw the hind legs continue to the back of the Puma, drawing the foot so it looks like it is standing on its toes.
Step 6
The tail will be made up of two curved bends as if they meet in a spiral.
Step 7
The other hind legs will be hidden the most, so draw a straight line from below and a small trail to the right of the foot. Finally color it, your Puma is complete!


