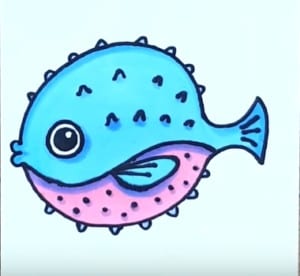
How to Draw a Puffer Fish step by step easy for beginners with this how-to video and step-by-step drawing instructions. Easy animals to draw cute for children.

Please see the drawing tutorial in the video below
You can refer to the simple step-by-step drawing guide below
Step 1
Draw the body of the Fish Puffer by making the most of a very rounded circle. Leave a blank space above where we will draw his face and fins later.
Step 2
For the left eye, draw a close loop almost to itself on the left side of the circle you drew. The right eye is just to the right of that, and is two circles, one inside the circle. Then draw a small curve above the line to imply a distinct shape. To make the mouth, draw an oval below and between the eyes. Put the two lines meet at their ends in circles to make the lips. Place in two dots to make the nostrils between the eyes and mouth.
Step 3
Draw the rest of the body with a curve that starts above the left eye, and goes up and to the right, before curving down. As soon as the curves create a small bump, where we will draw the fin after, then the tip ends. At the end of the tilt, draw a rounded corner that goes down and slightly to the left, before adding another corner, and a line that goes for, and slightly up to meet with the rest of the body.
Step 4
Now put in fins. One is on the bumps you left before, and should be a small rectangle that goes up and to the left. A wider rectangle should be placed at the back, pointing backwards. Next put in a final rectangle with an oval on its left side to the right of the eye, to make the side fins. Straight lines should be drawn from the stem to the ends of each fin to create the texture.
Step 5
For the last step, place a small V on the lower half of the body. The ends of each V should be directed toward the outside of the body wherever they are placed, not just straight down. This will make the spikes that Puffer Fish is known for. You can color the fish.


