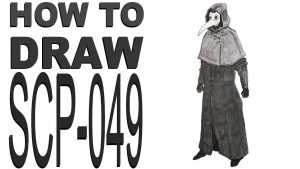
How to draw a plague doctor easy with this how-to video and step-by-step drawing instructions. Easy drawing tutorial for beginners and kids.

Please see the drawing tutorial in the video below
You can refer to the simple step-by-step drawing guide below
Step 1
We will draw the Plague Doctor in a medieval engraving style. First draw an oval for the head. Outline the body as a rectangle. Sketch hands and feet. We would like to note that in the first steps you should not press down on the pencil too hard.
Step 2
At first draw lines of symmetry on the face. The vertical line will help us find the center of the face and help draw the beak. Horizontal lines will help us to line our eyes. Draw the outer contours of the hat, which was characteristic of all doctors of the time. Draw the outline of the cane, cape, and cane in the Plague Doctor’s hand.
Step 3
Alright, now let’s move on to the third step of the how to draw Plague Doctor tutorial. Here we add volume to the hand. First, hand draw a long and wide cape, tucked into the gloves. Then draw the glove and outline the fingers.
Step 4
Now we need more details about the head of the Plague Doctor. First draw the slits for the eyes. Draw the lines of the fabric around the face. Visually, this fabric goes from under the hat, that is, from the temple through the cheekbones and the chin to another temple.
Step 5
Draw the lines of the fabric around the neck. Add details to the hand. First draw some creases on the sleeves. Carefully draw the palm and fingers. Put the volume into the stick in the hands of the Plague Doctor. And if you already know how to draw straight lines, visit our tutorial on how to draw Wolverine claws. Add some folds to the gloves to make our drawing more realistic.
Step 6
Remove all principles from Plague Doctor and start adding final details. Draw a line that divides the beak into two parts. To add realism, draw a seam above this line. Add some folds to the bottom of the cape. Darken all lines in the image and delete all remaining unnecessary lines. By the way, if this tutorial seems too difficult for you, we recommend the tutorial on how to draw an apple or how to draw an iPad.
Step 7
In the last step of how to draw a Plague Doctor, we will add shadows. The light on our image falls from the top right corner. It means that the protrusion of the upper right side compared to ours will be lighter than the lower left part. Contrary to the style of the comic, in this drawing we will not draw too contrasting shadows. Draw shadows with soft and smooth pencil strokes. Try to make the transition between light and shade as soft as possible.
That’s a pretty tough lesson, isn’t it? We hope that we have taught you how to draw a Plague Doctor. If you like difficult tutorials like this one, we recommend you check out our tutorials on how to draw Wolverine’s head or how to draw Sub-Zero. But if you like easy drawing lessons, we recommend the tutorial how to draw iPad or how to draw a donut. Share this guide with your friends and subscribe to us on social networks. Stay tuned and wait for new drawing tutorials on .com. GoodBye!


