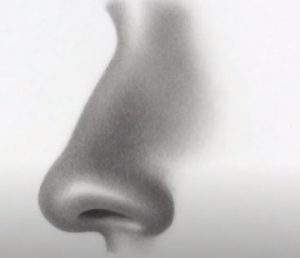
How to Draw a Nose From The Side by pencil with this how-to video and step-by-step drawing instructions. Pencil drawing tutorial for beginners and everyone.

Please see the drawing tutorial in the video below
You can refer to the simple step-by-step drawing guide below
Step 1: Draw two small circles
To draw the shape of the nose, you want to start with two generously spaced circles. (Imagine having a third circle in between 2). For the next step, I drew a triangle to show you how to draw the bridge / slope of the nose.
Step 2: Draw the bridge, tip of the nose and philtrum
Draw a curved slope up and around the left circle to form the head and the bridge and a curve below it to form a philtrum or cupid arc. Cupid bows should not go too far to the left or right. Draw it somewhere between the 2 circles.
Step 3: Add the nostrils
Create a round shape for the nostril. It should not be too long or too large. Again, try drawing between 2 circles.
Step 4: Make nose shadow
You can delete the circles at this time and start shading. As you can see, the shading technique used in this tutorial is circular. That will help achieve a more realistic skin texture. In my shading guide, I cover a few more shading techniques as well as tips on how to create a smooth shadow. Click here to go to my shading guide.
Step 5: Highlight the highlighted areas
Make sure you leave some highlight areas.
Step 6: Touch up
Here, I darkened some areas as well as walked through the highlights with the end of a kneading rubber eraser. The outline was also deleted a bit. I used a tree stump, to blend around the highlights to make the skin look less harsh.
I hope you enjoyed this tutorial on how to draw the nose from the side! If you have any questions or requests, let me know in the comments below!


