How to draw a muffin easy with this how-to video and step-by-step drawing instructions. Learn to draw for beginners and kids.
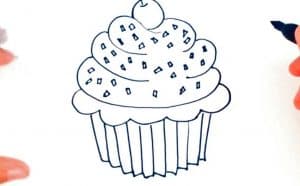
Please see the drawing tutorial in the video below
You can refer to the simple step-by-step drawing guide below
Step 1
First, outline the top of the muffin. This part looks like a small round cloud or turtle shell. The first step, you should use very light and pale lines. Remember that here we are just sketching the outlines of the future muffin and finding its best place on the paper.
Step 2
Sketch the bottom of our muffin. It narrows slightly to the bottom. Note that the bottom edge of the muffin is not completely smooth. Here, as in the previous step, you should use very light lines. As you can see, the sketch is slowly starting to look like a muffin drawing.
Step 3
Use clear and bold lines to trace the muffin drawing, giving it a finished look. At the bottom of the muffin, draw a series of long, evenly spaced lines. Do not place vertical lines too close together. Remove all unnecessary build lines if they are still present.
Step 4
So we’ve come to the final stage of the muffin drawing tutorial. Here you will need to draw a drop shadow to make the drawing look more eye-catching. First, you need to determine where the light is coming from. In our example on the left. With this in mind, let’s start carefully drawing the shadows using the hatch, as shown in our example. Furthermore, add a small area of shadow so your muffin drawing doesn’t look like it’s hanging in the air.
It’s a drawing tutorial on how to draw a muffin. If you like drawing food, you can see the entire category for drawing food. There we tell and show how to draw a large number of different dishes.
By the way, do not forget to subscribe to us on social networks. There we post news about published drawing lessons and announce upcoming lessons.
