How to Draw a Troll easy with this how-to video and step-by-step drawing instructions. How to draw cartoons for beginners and kids.
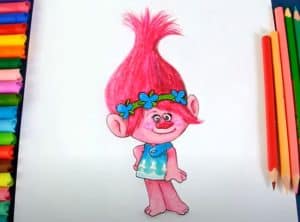
Please see the drawing tutorial in the video below
You can refer to the simple step-by-step drawing guide below
Step 1
In this troll drawing tutorial, we will style the picture after the character Poppy from the movie Trolls.
To get started with this character, you can start by drawing a circular, horizontal line for the base of her face. You can then add some large round ears on either side of her head, and then draw a flower headband across her forehead.
Finally, we’ll draw the famous troll hairstyle using some curved lines ending in some spikes on top. That should do the trick for this first step, and then we can move on to the next!
Step 2 – Now draw a face and some details on the face for the troll
For the next part of your troll drawing, we’ll draw some facial features along with some line details for the hair.
Her eyes will be drawn into a number of circles with round pupils inside. Then she will have a relatively large nose and a curved smiley mouth underneath it.
Finally for this step, we’re going to paint some simple line details into her hair to give it the look of individual, voluminous strands. Then you’re ready to move on to step 3!
Step 3 – Next, draw her first arm and start her body
Now we will move from the head and face and start drawing the body in this step of the troll drawing tutorial.
You can use some circles to draw her left arm curved up to below her face. Then you can start drawing the left side of her chest and this is the part that we will add in the next steps.
You can also pull the straps of her skirt down over her right shoulder.
Step 4 – Draw her other arm and waist
For this part of your troll drawing, we’ll add another arm along with finishing off her waist.
Use some straight lines to stretch her arm down to the right, then draw a small hand at the end of it.
Then we will finish drawing her body. The style the trolls use has them with their large heads and disproportionately small bodies.
This is worth keeping in mind when you draw the rest of her body. The bottom of her waist should be level with the hand on the right hand side that you just drew.
Once you’ve finished drawing, you’ll be ready for the final elements and details in the next step of the tutorial.
Step 5 – Add final touches to your troll drawing
This fifth step of our tutorial on how to draw a troll will help you finish with some final details and strokes.
The main thing that we will draw in this first step will be her legs. They can be drawn with some straight lines going down, and then we can draw some little toes at their base.
Once you’ve finished drawing her legs, you can finish this step by adding a floral pattern to her skirt.
You can then move on to the last step of the tutorial, but you don’t have to go on yet!
You can also add some elements of your own and some ideas would be to paint the background, add troll characters or even by changing the look of this one.
Step 6 – Finish your troll drawing with some colors
This is the last step of this troll drawing, and it’s going to be a really fun one! In this step we will color this lovely troll.
As we mentioned before, this troll game we drew is modeled after the character Poppy from the Trolls movies.
For that reason, we used her palette from the movies, and that meant using some shades of pink and blue throughout the drawing.
You can use this as a reference point if you want to keep her colors looking right with the film, but you can also use some of your own!
Troll dolls usually come in some bright and vibrant colors, so you can really go free with your favorite colors.
You can also use some lovely bright art media like acrylic paints and markers to really make the colors pop. How would you color this troll drawing?
Your Troll drawing is done!
With that, you’ve finished this tutorial on how to draw a troll!
This is a really fun image to recreate and we hope that by following the steps in this tutorial you find it an easy and rewarding experience.
Breaking a drawing down into smaller, more manageable steps is always the best approach when trying to draw something new, so that’s what we wanted to do for you.
Now that you’ve finished this troll, you can continue the fun with your own idas.
You can paint the background, add some other trolls or even change the details to create your own unique troll game. We can’t wait to see what you can come up with!
