How to Draw a Limousine Car with this how-to video and step-by-step drawing instructions. In about fifteen minutes, you will learn how to draw this long car in a series of steps. You will also draw some of the details that make this car special.
Please see the drawing tutorial in the video below
Limousine Car Drawing step by step
Step 1. Draw the Roof
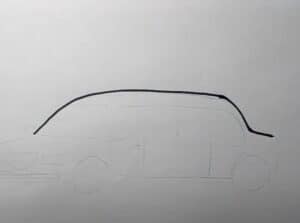
Start by drawing a long curved line to form the limousine roof.
Step 2. Sketch the Windshield, Windows, and Side Mirrors
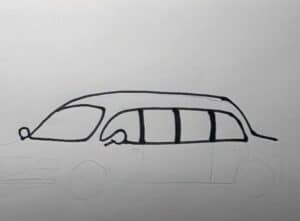
Sketch the shape of the windshield and long windows. Add vertical strips on the limousine windows.
Attach the oval side mirrors to the corners of the windows. Make sure to erase any overlapping lines.
Step 3. Add the Front of the Limousine
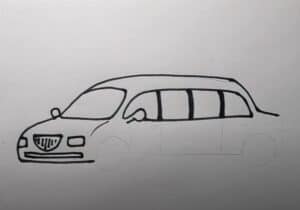
Draw the front of the limousine by drawing a curved line as shown.
Draw two rectangular headlights. Next, create a grille in the middle of the headlights. Then, sketch a thin rectangular vent on the bumper.
Step 4. Create the Limousine Body
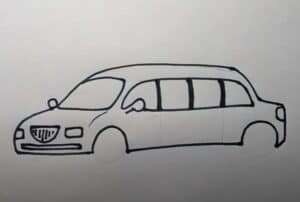
Create a long limousine body and add two ledges for the fenders. Next, sketch the bumper near the bottom. Then, add the curved shape of the taillights at the back.
Step 5. Create the Tires and Door Panels
Create a circular cylinder for the Limousine tires.
Add two door panels to the side of the Limousine. Then, draw thin door handles.
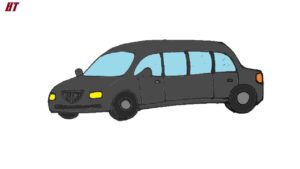
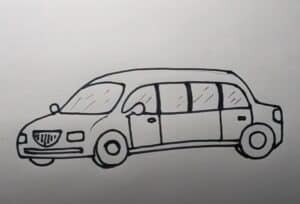
Step 6. Color the Limousine Drawing
Color the windshield and windows with a light blue color. Next, color the headlights yellow and the taillights red. Now, paint the limousine white. Then, use gray for the rear bumper, wheels, and grille frame. Finally, color the grille, vents, tires, and vertical strips on the windows black.


5
4.5