How to draw a Hot Rod Car with this how-to video and step-by-step drawing instructions. The lesson will take about ten minutes, giving you time to sketch and color. You will see how the basic shapes come together and focus on the details that make this classic car unique.

Please see the drawing tutorial in the video below
Hot Rod Car Drawing step by step
Step 1. Create the Roof, Windows, and Body
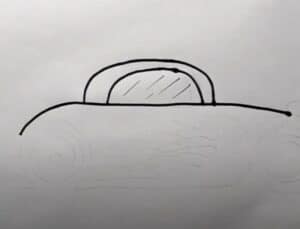
First, draw the box shape of the hot rod roof. Sketch the rectangular windows with curved edges. Create the hot rod body outline similar to the illustration.
Step 2. Attach the Lights

Attach the small fender lights on top of the fenders.
Step 3. Draw the Fenders and Side Skirts
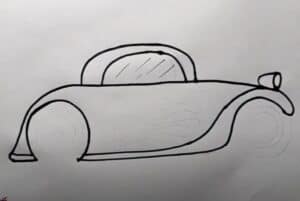
Draw the fenders over the front wheels. Then, extend the fenders to form the side skirts as shown.
Step 4. Add the Wheels
Create the ring-shaped outline of the tires. Next, add smaller circles for the wheels and hubcaps. Make sure to draw the rear tires a little larger.
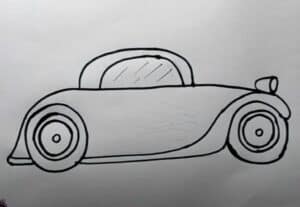
Step 5. Add the Flame Decals

Add the Flame Decals to the hot rod body.
Step 6. Color the Hot Rod
First, color the tires black. Next, color the wheels with shades of gray. Now use orange and yellow for the car’s flames and fender flares. Then use light blue for the windows. Finally, paint the hot rod with dark purple shades.
You can see more car drawings: