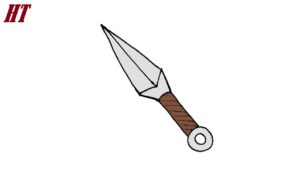
This tutorial shows how to draw a kunai, a dagger like object that can be used as a weapon. It consists a total of six steps that cover line drawing, coloring and shading.

In anime and manga, kunai is often used as a weapon of ninja. However, although kunai resemble daggers, they were originally used as garden tools.
In this case, the kunai will be drawn in a vertical position but of course you can rotate your drawing as you wish. There is also an example at the end of the tutorial drawing on a corner.
Unless you’re drawing digitally, it’s a good idea to start the tutorial with a pencil and create light, easy-to-delete lines. You can darken them before coloring.
Please see the drawing tutorial in the video below
You can refer to the simple step-by-step drawing guide below
Step 1 – Sketch the Kunai Sword
Start drawing by creating a vertical line. The purpose of this is to help you ensure that the drawing doesn’t warp and to make it easier to see if the kunai is symmetrical.
Towards the bottom of this line draw the blade. You can make it shaped like in the example.
If you want to draw the kunai at an angle then of course you can also draw the line at an angle.
Step 2 – Sketch the handle
Going up from the blade add the handle. While it looks cylindrical from this view, it will look like a long rectangle. You can define the bottom and its edges with straight lines, but draw the top (back of the handle) slightly upwards.
The handle should be quite thin relative to the blade, much thinner than what you would normally find on a knife or dagger.
Step 3 – Draw the ring
At the end of the hand holds an extra ring. First, draw the outer shape that connects to each side and then the smaller inner circle.
After completing this step, you should have a basic outline of the main part of the kunai.
Step 4 – Show the edges of the blade
At this point, you can delete the center line added in step one along the ring and handle. Leave it along the blade and draw another pair of lines running from its top end towards the corners. This will help show the sharp edges of the blade.
Step 5 – Draw Handle Wrap & Finish Line Drawing
Run along the handle some more packs. Draw this as a series of angled lines with a straight line at the end of the handle.
Step 6 – Apply Color
In the anime and manga, the metallic part of the kunai can be rendered with different shades of gray, depending on the artist’s preference. They can also be black.
In this case, the blade will have a solid gray color. You can also color the ring using the same shade of gray but leave a few curved white reflections as in the example. Finally make the handle a light yellow with a bit of brown and/or gray in it.
Conclusion
This is a pretty simple tutorial but it can still be very helpful if you’re looking to draw a kunai stick. Like the other tutorials here on .com, it focuses on the anime style but with a good approach to drawing in general. It shows how something as simple as drawing a line as a guide can be very helpful in avoiding common mistakes. It also illustrates how you can make your drawing look significantly better with some very basic shadows.


