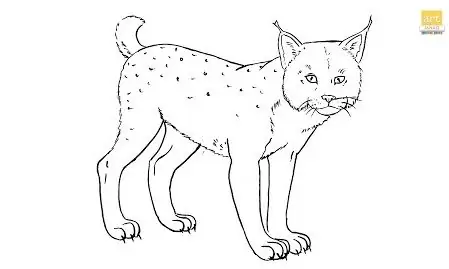
How to draw a Lynx easy with this how-to video and step-by-step drawing instructions. Easy animals to draw for beginners and kids.
Please see the drawing tutorial in the video below
You can refer to the simple step-by-step drawing guide below
Step 1
Draw head. It is almost a circle but with a flat top. There are two upside-down “U”s in the top corners. These are the ears.
Step 2
Next draw the face. Just below the ears there are two short curved lines. Between them were two black eyes. In the center of the face is a round nose with a curved mouth and jaw underneath.
Step 3
From the right side of the head, draw the body line to the right. Firmly fold it down at the base.
Step 4
At the bottom of the tendon, draw a long line down to make the back leg. There is a large foot at the bottom of the line with three toes. Draw the remaining leg line up and tilt to the left.
Step 5
Starting at the top of the hind leg, draw the remaining hind leg down. There are only two toes on this foot. Draw the remaining leg line up and curve it to the left.
Step 6
From the lower right side of the head, start the front leg down through the belly and end it level with the back leg. Don’t forget to draw three toes on the foot. Draw the remaining leg line upwards.
Step 7
Draw the remaining front leg line down from the bottom left of the head. It ends in the same place as the other front leg. There are two toes on the bottom.
Step 8
Finally draw the tail. There is only one line from the buttocks to the instep of the hind legs.


