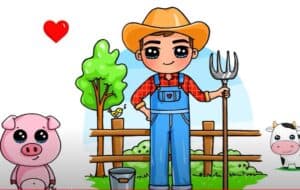
How to Draw a Farmer with this how-to video and step-by-step drawing instructions. Easy drawing tutorial for beginners and kids.

Please see Farmer drawing tutorial in the video below
Simple Farmer Drawing Step by Step
If you regularly follow the lessons presented on this website, then you already know that all the instructions are very simple and clear. Now I suggest you complete another interesting lesson in which you will learn how to draw a farmer.
The step-by-step instructions are specially designed for beginner artists, so you will easily follow all the drawing steps. A farmer is someone who owns land and does agriculture.
You see that the farmer wears comfortable work clothes, wears a hat to protect himself from the sun, and holds a pitchfork in his hand. The farmer is presented in a cartoon style and therefore has unrealistic proportions. The farmer has a big head and a small body.
Try to keep these proportions in your drawing. To color the farmer you can use the same colors as in the example or you can paint with any other color.
Step 1. Draw the head and body.
First draw the head in an oval shape, then add the body.
Step 2. Add facial features.
Depicts oval eyes, teardrop-shaped eyebrows and a small curve for the nose.
Step 3. Add mustache and beard.
Use jagged lines to depict a long, bushy mustache.
Step 4. Sketch the hat.
Use smooth, rounded lines to draw the wide-brimmed hat.
Step 5. Draw the legs.
Draw straight lines from the torso down and draw the short legs.
Step 6. Draw the arm.
One hand is close to the body, the other hand is raised to the side.
Step 7. Add the pitchfork.
Draw a long handle and three sharp prongs above.
Step 8. Describe the clothes.
Add sleeves, draw overalls and erase all the extra lines in your drawing.
Step 9. Color the farmer.
At this stage, choose any color.


