How to draw a Dragon Tattoo easy with this how-to video and step-by-step drawing instructions. Tattoo drawing tutorial for beginners and everyone.
Please see the drawing tutorial in the video below
You can refer to the simple step-by-step drawing guide below
Step 1
Well, you’re about to start the first step of this drawing lesson and I hope you’re ready to have some fun. You will start by drawing a small circle for the head and then the shape of its snout as seen. Add the guide lines on the face and then draw a total of three small circles for the chest, groin, and feet. You will then attach the body and limb guides to the shapes you just drew.
Step 2
Okay, now in this step you will start outlining the shape of the mouth and muzzle as shown. Next draw the eyes and two long lines for the horns. Start adding some thickness to the body by adding the stomach and tail line, then you’ll start sketching at the paws and claws. Once done, you can add some detail to the arms and thighs or knees.
Step 3
Well, you’re on the third step and I know you know what that means right? Well, you’re almost done. What you will do here is first outline the dragon’s face by outlining its nostrils, eyes and the shape of its head along with the feathers around its face. Then you will thicken the horns as seen here and paint the neck lining as well. Add the shape of the dragon’s arms and hands, as well as its legs and tail. As you draw the bottom of the legs, make sure you add hair.
Step 4
Well, you’re on step four and you know what? Step four is pretty easy. All you will do is outline his thick beard and then detail and define his face and add his sharp tongue. Then you will work on the claws and the hair on the back of his neck as well as add some details to the body. Next outline his bushy tail and then add the shapes of his legs.
Step 5
You’re just going to add some definition and detail to the beard and bushy-looking back hair. Next, start adding all the razor sharp teeth and detailing its snout. Then you’ll start sketching a much better hand or claw as well as detailing the body and feet. After doing that, you can take this step and move on to step six.
Step 6
Right! You have reached the final drawing step and all you have to do is add vertical abdominal lines. You will detail the horns and then outline the rest of the tail as seen. Once done, you can go ahead and start erasing all the principles and shapes you drew in step one.
Step 7
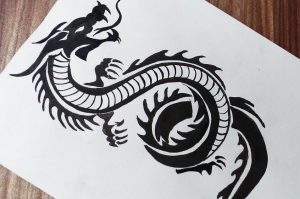
And this is what your dragon tattoo will look like when you’re done. Neat right? Just add some colors of your choice and you’re done with this step-by-step dragon tattoo tutorial. I hope you learned something new with this lesson, I’ll be back with more so stay tuned everyone.


