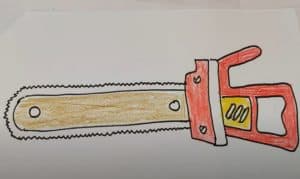
How to Draw a Chainsaw easy with this how-to video and step-by-step drawing instructions. Easy drawing tutorial for beginners and everyone.

Please see the drawing tutorial in the video below
You can refer to the simple step-by-step drawing guide below
Step 1
Let’s start by drawing a saw using the fact that we outline the tool’s cover and the guide bar. At this step, these details look like an irregular semicircle and a long half. Recall, use very light lines so that you won’t have difficulty deleting these tutorials in the future.
Step 2
Now let’s add some details to the casing of the chain saw. First, let’s create a few lines on the front surface to give weight to the drawing of the chain saw. Next, outline front handle, front arm guard and pull handle start. We will complete this step outlining the oil cap and rear handle.
Step 3
In the previous step we have finished outlining the main parts of the chain saw, and now we need to use darker and sharper lines to give the chain saw drawing a complete look. At the same time remove all unnecessary instructions and add details such as fuel cap and air intakes.
Step 4
To make the drawing of the chainsaw nice and complete, we need to add the shadow. But first draw the chain spikes on the long guide. Next, with the help of hatching, add shadow to the saw cover and some glare on the guide with the help of a few long strokes.
As we wrote above, the chain saw is quite a popular tool, so you can draw the saw separately, either in the hands of a woodcutter or Jason Voorhees. We really hope that this lesson has been helpful to you. If that’s the case, remember to post comments, subscribe to us on social media (we are on Pinterest, Facebook, Twitter and other popular social networks) and share this lesson with others as well. want to learn how to draw.


