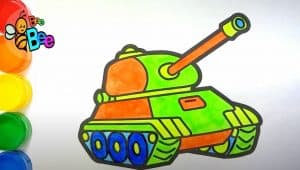
How to Draw A cartoon Tank easy with this how-to video and step-by-step drawing instructions. Simple drawing for kids and everyone.

Please see the drawing tutorial in the video below
You can refer to the simple step-by-step drawing guide below
Step 1
In the first step of your animated tank drawing, we will create a sizable portion of the tank.
You will probably want to use a ruler for most of this tutorial, as there will be some lines and angles used throughout.
There are also two round headlights at the front of the tank and the outline of the tires will be drawn with some rounded shapes below their fenders.
Step 2 – Next, draw some more details
This step of our how to draw an animated tank tutorial will focus on adding some details and additions to the areas you started with in the first step.
First, there will be a rounded object with some contour detail on it near the back of the right fender.
Finally for this step, outline the left tread as it appears in our reference image.
Step 3 – Now draw the details on the grooves
Tank tracks act like a conveyor belt and they need texture on them to create friction that pushes the tank forward.
We will add this texture to the surface of the grooves in this step. To do this, we’ll add some pretty simple horizontal lines on the spike surface.
The reference image is there to guide you on how to place these lines to show perspective.
Step 4 – Next, draw some more details on the grooves
Continuing with this animated tank drawing, we will now add some details on the inside of the tire. There are wheel-like structures inside the belt of the grooves, and we will draw these structures now.
Each one of these wheels will have an oval outline with a small, rounded section sticking out of it.
We will also add some smaller details to other parts like the front of the tank. Once you’ve got it like in our reference, we can move on!
Step 5 – Now draw the beginning of the top part of the tank
We’ll start with the top of the tank in this step of the tutorial. Before that, we’ll add a rather large rectangle to the front of the tank with some smaller ones below it.
Then we will add the top rotation of the tank.
This section is made up of a number of different circular sections connected together and the top should be fairly flat. Then we’ll be adding some more to this section soon!
Step 6 – Next, draw the continuation of the top part
For this part of your animated tank drawing, we’ll draw the rest of the top section you started with in the previous step.
We’ll add another round section to the left, and this will have a space in it where the cannon will go in the next step. We have another flat section to add on top, and then the final detail!
Step 7 – Next, draw some final details
In this step of the tutorial on how to draw a cartoon tank, we will add the final details and elements to get you ready for the final step.
First, draw the tank’s cannon. This has two straight lines for the main arm of the cannon, and then has a thicker cylindrical section at the end of it.
We’ll then add dots around the tank’s details to indicate where the studs and bolts hold it together.
After these final strokes are added, will you draw some more details? Maybe you could add a background image to show where this tank is in action!
Step 8 – Now finish it with some color
Now you are ready to complete this amazingly animated tank with some color! Tanks can have different colors depending on the environment in which they are operating.
In our reference image, we chose a mixture of darker gray and yellow to give this tank a really striking look.
These colors can be used for your own drawings if you like how they look, and you can use your favorite art mediums to bring the colors to life.
You can also choose some of your own unique colors and you can even take it further with some camouflage patterns. How will you finish this amazing tank?
Your cartoon tank drawing is done!
This cartoon tank drawing tutorial is one of the trickier drawing tutorials we’ve featured, so you should be more than proud to have done such a great job on it!
Although there is a lot of detail to draw here, by breaking it down and taking it one step at a time, you can make it a lot easier.
This not only makes it more interesting, but also allows you to customize the drawing with your own interesting details and ideas.
Whether you add some extra accents, create a background, or experiment with your colors and media, we know it will look great!


