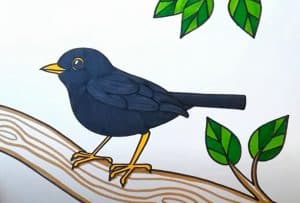
How to Draw a Blackbird easy with this how-to video and step-by-step drawing instructions. Bird drawing tutorial for beginners and kids.

Please see the drawing tutorial in the video below
You can refer to the simple step-by-step drawing guide below
Step 1
To draw the very popular Black Bird, start with the head, mainly the beak. Draw a rounded triangle for the beak and leave a few rounded bits in the back for the head.
Step 2
To draw the head, make a small curved line from top to bottom. Then add another line going down below the beak for the body.
Step 3
To create the back of the Black Bird, draw a long, smooth line down the back. Bring it to a point for the tail at the bottom.
Step 4
Now, for the belly, draw a long, curved line from the neck down.
Step 5
Draw the bottom part of a circle for the legs and continue by extending two lines down for the legs. Add two pointed toes on the bottom of the foot for the foot.
Step 6
Now, add the second leg after the first by creating a straight line.
Step 7
Now add the Black Bird’s long wings by making a few pointy points of feathers. Don’t forget the remaining wing behind the body.
Step 8
Now, extend a few long lines for the tail feathers. Keep a few tips at the end.
Step 9
Color your Blackbird from head to toe!


