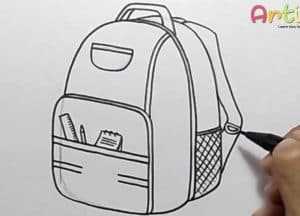
How to Draw a Backpack Easy with this how-to video and step-by-step drawing instructions. How to draw step by step for beginners and kids.

Please see the drawing tutorial in the video below
Backpack Drawing step by step
Step 1
In order not to be confused when drawing a backpack, we first need to outline the lines on the backpack with very light and smooth lines.
Step 2
Now outline the shoulder straps, a pocket at the front and a handle at the top. Don’t try to make all these lines too dark, so in the next steps it will be easier for you to make changes.
Step 3
Now draw all the lines, make them clear, beautiful and complete. Draw the locks, tabs, and seams. Using an eraser, erase all unnecessary guides from your backpack drawing.
Step 4
Now, using dashes, outline the folds and draw shadows, as the HTDraw.com artists did in our example. To make the shadows darker, just add another layer of bloom. To diversify your backpack drawing, add some kind of logo, label or patch.
Like all the other lessons, this one is quite detailed and we hope that all our readers can learn how to draw a backpack. Of course, backpacks are intended for many different purposes – for study, travel and military purposes. But they are all united by the fact that with the help of our drawing tutorials you can draw any of them. By the way, we look forward to receiving your subscriptions on the pages of our social networks, that is, Facebook, Pinterest, Twitter and not only.


