How to draw an ear (site view) easy by pencil with this how-to video and step-by-step drawing instructions. Easy Pencil drawing tutorial for beginners and everyone.

Please see the drawing tutorial in the video below
You can refer to the ear drawing step-by-step drawing guide below
Step 1. Sketch the Frame
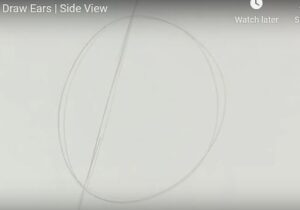
First sketch the frame to draw the ear accurately. Draw a diagonal line about 20 degrees to the right, then draw an oval over the line with the left side being 1/4 of the oval as shown.
Step 2: Draw the Shape of the Ear
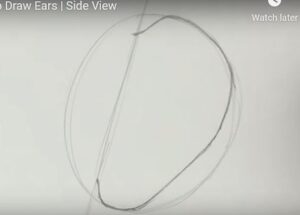
Sketch the shape of the ear with a C shape, making sure the bottom of the ear (the earlobe) is smaller than the top of the ear (called the spiral).
Step 3. Draw the First Bump and Fold
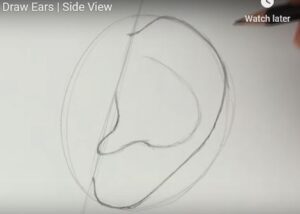
The first curve and has a teardrop-shaped bottom. Wrap the curve around to form a flap (called the tragus). Make sure you leave a large gap at the bottom for the earlobe.
Step 4: Draw the Second Bump and Fold
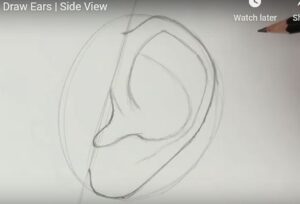
The second curve should run along the middle to the top of the ear. You can make this curve as smooth or rough as you like. Remember to leave a small gap around the edge. The left side of the curve should curve slightly towards the middle of the ear.
Step 5: Prepare to shade
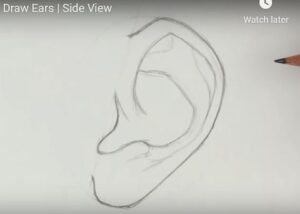
At the beginning of the tutorial, I outlined the three main shapes inside the ear. We drew two in steps 3 and 4. The third shape looks like a ‘y’. You can draw the ‘y’ very lightly or visualize it on your drawing. We will use it later in this step. Decide which direction the light is coming from and use soft lines to indicate where the darkest shadows will fall. These will be the most prominent creases and deepest valleys inside the ear. For this example, the light is coming from the left side.
If any of the shadows go through the ‘y’, make sure you curve them to complement any ridges, ridges or valleys of the ‘y’.
Step 6: Shade the darkest areas
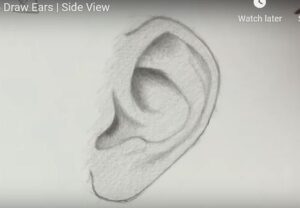
Shade the areas outlined in the previous step with a 4B pencil. Remember to shade the deeper parts of the ear darker and shade the lighter edges.
Step 7: Add a medium tone and a light tone
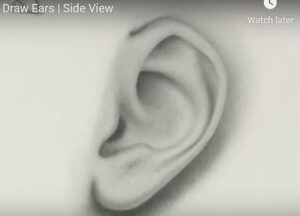
Using the hb pencil, shade the rest of the ear, keeping in mind that the edges should be the lightest and the valleys the darkest. Use a blending brush to blend each area separately (learn how to use a blending brush here). Use a kneaded eraser to highlight the lightest areas of the ear if needed.


