How to draw a Frozen Lake scenery with this how-to video and step-by-step drawing instructions. Easy landscape drawing tutorials for beginners and all.
Please see the drawing tutorial in the video below
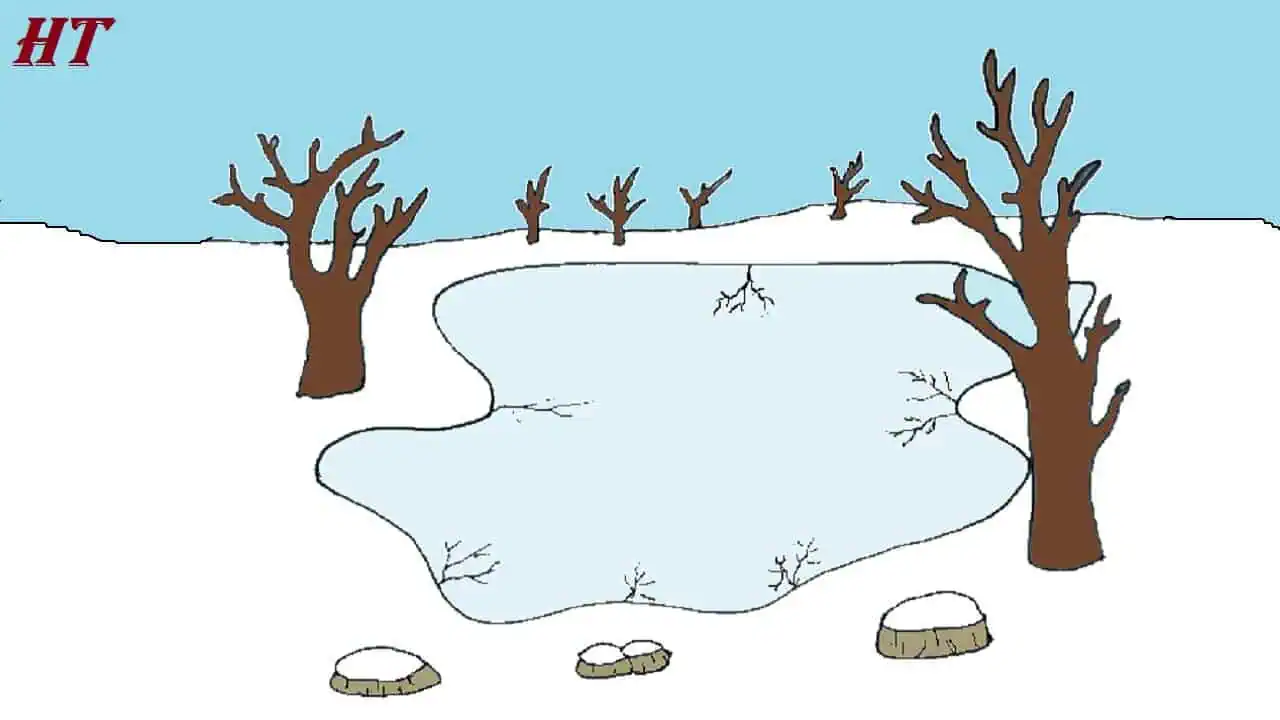
Frozen Lake Drawing step by step
Step 1. Draw the Trees

First, draw two large, leafless trees with only trunks and branches standing starkly against the ice and snow. Note that these two trees are on opposite sides of the lake, so they should be spaced far apart as shown in the illustration.
Step 2. Sketch the Lake

Next, create an irregular, closed shape to outline the frozen lake in the middle or the ancient trees you just drew.
Step 3. Add Cracks

Next, draw thin, jagged cracks on the surface of the lake’s ice.
Step 4. Sketch the Snow-Covered Ground

Draw a wavy horizontal line to outline the snow-covered ground behind the lake, adding a row of leafless trees further back to create a cold winter scene.
Step 5. Add Rocks

Draw oval-shaped rocks with snow-covered tops.
Step 6. Color the Frozen Lake
First, use a light blue color for the sky. Next, color the frozen lake a vibrant blue with light blue streaks. Then, shade the snow-covered ground a pale white. Now, color the trees a dark brown. Finally, color the rocks gray and white to create the effect of snow-covered peaks.