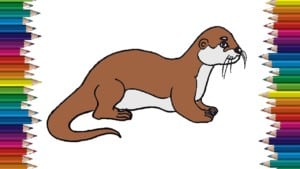
How to draw an otter cute and easy step by step for kids with this how-to video and step-by-step drawing instructions. Easy animals to draw for children.

Please see the drawing tutorial in the video below
You can refer to the simple step-by-step drawing guide below
Step 1
Draw an otter! Draw your head by tracing a shape that is almost like a petal!
Step 2
Then make a face by drawing a small circle for the eyes, a very small petal shape just below the eyes, and a circle that traces along the tip of the head, to the nose.
Step 3
Draw a circle along the head for the body.
Step 4
From there, draw two curves and meet at the end. Have your thin tail!
Step 5
Next, paint the hind legs by tracing two straight lines at the top but together at the bottom so you can draw a long, flat foot.
Step 6
From the hind legs, follow a long curve along the lower part of the body for the abdomen.
Step 7
Now, you can put your belly and neck together by drawing your forelegs. Like the hind leg, it is broad at the head but smaller at the bottom.
Step 8
Next, draw another hind leg. Here is a tip: hide it behind the hind legs first so you mainly see the feet long, flat.
Step 9
Draw another front leg, tracing it at the top and the small at the bottom. Have your otter!
Step 10
Finally color it to be more realistic.


