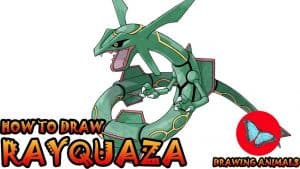
How To Draw Rayquaza Pokemon with this how-to video and step-by-step drawing instructions. Pokemon drawing tutorial for beginners and kids.

Please see the drawing tutorial in the video below
You can refer to the simple step-by-step drawing guide below
Step 1
To start Rayquaza, we first need to draw a long, thin lock of hair for the basic shape of his body.
Step 2
Next, draw a Rayquaza mouth outline on the thicker end of the curled shape.
Step 3
Draw the inside of Rayquaza’s mouth as a peculiar shape with a few sharp points instead of teeth.
Step 4
Next, draw a triangular brow line, and draw a Rayquaza eye underneath it.
Step 5
Now we can move down a bit— draw a small circle on each side of Rayquaza’s body with two narrow rectangles sticking out of each for his arms.
Step 6
At the end of the arm, draw Rayquaza’s hand with three small fingers and three claws.
Step 7
Next, draw Rayquaza’s large plane-like fins protruding from the back of his head.
Step 8
To give him a military look, we’ll add some square fins along the length of Rayquaza’s body as shown in the image.
Step 9
Add a few more sets of fins to Rayquaza’s body and a few more to the end of its tail.
Step 10
Finally, draw Rayquaza’s ring pattern running the length of his body.
Step 11
We’ll show Rayquaza a little color and he’s done! I hope you enjoyed learning how to draw Rayquaza with me. If you did, be sure to share this tutorial on social media and stop by for more tutorials. Happy drawing!


