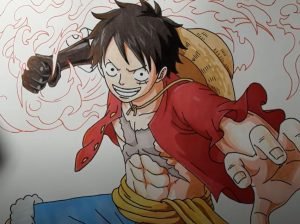
Luffy Drawing easy with this how-to video and step-by-step drawing instructions. How to draw cartoons for beginners and everyone.

Please see the drawing tutorial in the video below
You can refer to the simple step-by-step drawing guide below
Step: 1 Draw a circle
This is the first step to draw this Luffy drawing. Guys, do you know Luffy’s other name? It’s Monkey D. Luffy. And he is also known as “Straw Hat”. It is a fictional character and the main protagonist of the One Piece Manga series, created by Eiichiro Oda. Now let’s go back to the step in this step, you just need to draw a big rough circle for the outer structure of the character’s face.
Step: 2 Draw the intersecting lines
So guys, this is the second step to draw this Luffy drawing. First of all you have to draw a vertical line to cut the center of the circle and cut the circle at the two ends of the circumference.
Then you have to draw two horizontal lines as you can see in the image above. small vertical lines as you can see above jn image attached at this step.
Step: 3 Draw eyes
So guys this is the 3rd step to draw this picture in this step we will draw the eyes for the character. So first draw a circle for the right eye then draw a circle for the left eye, after you have drawn the circles draw a small circle in both eyes and shade the circle like you can see in the picture above. At this point we are half done with the drawing, let’s move on to the fourth step.
Step: 4 Draw Luffy’s nose and mouth
So guys this is the fourth step to draw this drawing. In this step, you have to draw rough guide lines for the character’s eyebrows and part of the lips. So first draw an oblique line on the character’s right eye and an oblique line on the character’s left eye, then you have to draw guide lines for the lips as you can see in the step above.
Step: 5 Draw Luffy’s Hair
So you guys here are the fifth step to draw this picture. In this step, you have to draw the hairs of this character. This character’s hair is curvy, wavy and a bit grassy so let’s start from the right side of the drawing after you have drawn the hairs you have to draw the shape of the circle on both sides. two sides as you can see in the attached image in this step.
Step: 6 Luffy Drawings Made
This is the last step and the sixth step to draw this drawing, first you have to draw the shoulder and the cloth he is wearing it’s a jacket or whatever after you finish you have to sketch the picture. draw. with black sketch pen after sketching your drawing you can color it or it’s your choice. I hope you have understood and enjoyed making this drawing.


