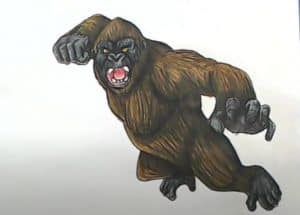
King Kong Drawing easy with this how-to video and step-by-step drawing instructions. Learn to draw for beginners and everyone.
Please see the drawing tutorial in the video below
You can refer to the simple step-by-step drawing guide below
Step 1
Let’s start by drawing two circles. One is an egg-shaped head and the other is also ovoid, but larger and wider. Notice how the large circle overlaps the smaller circle.
Step 2
Now here’s the goofy image, let’s make two small circles on both the left and the right. Both circles overlap the larger circle. Now move down a bit and draw two other circles that are slightly larger, the one on the right and the other an egg shape. It is also pushed out of its inner shape.
Step 3
Now you can start sketching his arm which will later form his shoulder and forearm. Finally, all the shapes will connect and form.
Step 4
Now this is you sketching the shoulders and connecting them with the shapes you drew earlier. Your drawing should look like this when you complete this step. One more thing, your drawing lines should have roughness to them, remember King Kong has feathers.
Step 5
Continue with finishing the arms by sketching the arms. Looking at the picture you can see the ape’s hand is starting to take shape and this is exactly what you were looking for.
Step 6
Sketch out the shape of the gorilla’s head and remember not to forget the fur detail as you shape its head. Once you’re done, move his head over his torso. He is a large gorilla so he will have the same characteristics as one. Keep that in mind while you sketch him. Move onto his hand. One hand in the air and the other on the ground with fingers curled inward.
Step 7
Start outlining his chest in this step. His nipples protrude from his chest. An easy way to draw two pectoral muscles is to draw two large U’s. Also prepare his chest for a lining for his fearful signs. Scroll down on the image and outline his leg. Connect his hips to his torso. Draw the lining for his feet also in this step.
Step 8
In this step, what you will do is perfect the foot, left hand and leg of the monkey. The upcoming hard parts will follow.
Step 9
Define his face by drawing his nose. Now, the nose that looks like a heart has a fancy shape, and the eyebrows are shaped down and meaningful. Put the scares on his chest and make them look like they were recently unwrapped. Before you leave this step, draw nails on his toes.
Step 10
Finish off the face in this step by drawing the frowning eyes around the mouth and the scars on the face. He’s a mean-looking gorilla isn’t he.
Step 11
Now in this step is all about details. Gently outline the fur on his arms. Do this by sketching v-shaped waves. Drawing this is like sketching your hair. Add details to his fingers, knuckles, toes and chest with simple crevices. Although the photo does not show his whole body should be covered with a light coat, except for the chest part.
Step 12
Here is your finished image. Your King Kong gorilla will look like this when you’re done. I know he has a hard time drawing but it’s all worth it in the end. You can color him if you like or you can let him be his way. Until the next time.
