Godzilla Drawing easy with this how-to video and step-by-step drawing instructions. Easy drawing tutorial for beginners and everyone.
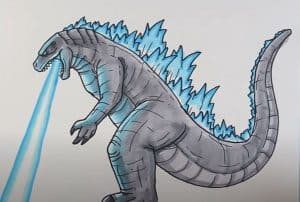
Please see the drawing tutorial in the video below
You can refer to the simple step-by-step drawing guide below
Step 1
Draw three circles, one small, medium and large.
Step 2
Next, start shaping the guides by outlining the tail, head, and midsection.
Step 3
In this step sketch out the image of the face and move down to draw his arms and put some muscle in there, he’s fine anyway. The tip of the tail can also be outlined.
Step 4
Remember that Godzilla looks like a big lizard/dragon. Draw the back lining of his back and feet. I found this step a bit difficult because of the shape of his back.
Step 5
This is you will do the pedicure and pedicure. Draw some details in the mouth and hidden hand details.
Step 6
Start adding spikes on its tail. A good way to create their shape is to think of a maple leaf. That was the whole idea when they created Godzilla. The spikes on his back are said to resemble a maple leaf.
Step 7
Now again go up to the tail and keep drawing spikes until you reach the top.
Step 8
As you go up, the spikes get more intense and denser. Some may look like the ends of swords.
Step 9
As you can see now, the spikes are really intense and should be practically all you need. You don’t want to overdo the number of spikes you add, or they will start to mess up.
Step 10
Now what you do is erase all the guides and outlines, and you will end up with a sketch like the one shown above. Well done job well done.
