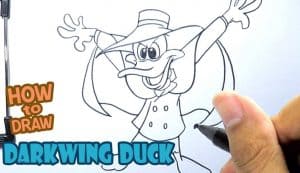
Please see the drawing tutorial in the video below
You can refer to the simple step-by-step drawing guide below
Step 1
At first, draw a man with sticks and circles. We do it to outline the Darkwing Duck’s general proportions and position on paper. Use a circle to outline the head. Then use the lines to draw the spine, arms and legs. Note that he has disproportionately short arms and legs (such as in the Spike tutorial from My Little Pony).
Step 2
Add some volume to Darkwing Duck’s body. But first, outline the symmetrical lines of the face. The vertical line will help you find the center of the face and the horizontal line will help you draw the eyes. Use the cylinder to draw the neck and arms. Then use a rectangle to outline the body. Then use curves to outline the pins. Draw the feet slightly flared forward.
Step 3
Now add some details to Darkwing Duck. First, use curved lines to draw a hat with a wide brim. Then outline the beak using smooth and curved lines. In this step, draw the outlines of the cape with long, curved lines.
Step 4
Continue drawing Darkwing Duck. Add final details to Darkwing Duck’s head. Use the oval to draw the eyes. Draw eyelids and pupils half-closed. Erase all the guides and darken all the lines on top.
Step 5
Detailed drawing of Darkwing Duck’s arms and torso. Draw the cuffs and collar, then draw the buttons on the chest. The lines should be dark and clear, like in our example.
Step 6
So we have come to the final step of the tutorial on how to draw Darkwing Duck. In this step we work on the lower part of Darkwing Duck. First, trace the lines of the robe. Then draw the legs and remove all unnecessary lines from your Darkwing Duck drawing.
It’s a drawing tutorial on how to draw Darkwing Duck step by step. If this tutorial was interesting and informative for you, please share it with your friends and subscribe to us on social networks.
