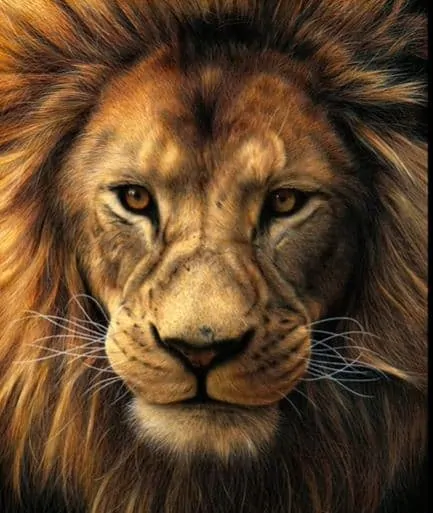
How to draw a realistic lion face with pencil with this how-to video and step-by-step drawing instructions. How to draw animals for beginners and everyone.
Please see the drawing tutorial in the video below
You can refer to the simple step-by-step drawing guide below
Step 1
Are you ready to paint a great realistic lion? Well, start with a circle for the head, and then add another circle for the muzzle. You will also need to outline the shape of the giant lion’s mane, and then face instructions.
Step 2
With a light touch, start sketching the mouth, nose and bridge for the lion’s face. You will then add a starting liner for the eyes.
Step 3
Now the lesson begins a great turning point. What you’ll do now is start sketching realistic frames of realistic lion faces starting with the forehead, cheeks and chin. When you’re done, you can add the tip of the nose, and then color in the m
Step 4
You will start adding some real details to the face that will help the lion look real, majestic and most important, like a king. Color in the white areas in the lion’s eyes, and then paint some mustaches, and beards.
Step 5
Now you can start sketching one of the main parts of the lion’s mane shape. You should sketch the mane with soft, thick strokes. This will add some bold edges, and realistic hair. Once done, you can add some small touches to the incre
Step 6
For your final step, all you need to do is add shadows. But before you do that, you have to delete the lines and shapes you drew in step one. If you look at the step you will see that the shadows are done in layers. This will not only add texture to the mane, it will also give the lion a full haircut. Also, add some shadows on the sides of the nose, and then add some color inside the nostrils.
Step 7
When you’re done, you can color with this lion colored pencil to make it look more realistic.