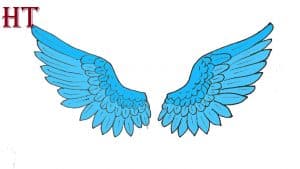
How to draw wings easy with this how-to video and step-by-step drawing instructions. Easy drawing tutorial for beginners and everyone.

Please see the drawing tutorial in the video below
You can refer to the simple step-by-step drawing guide below
Step 1
First, we will sketch the contours of the upper part of these wings. Mark noticeable bends in the central parts of both shapes.
Step 2
Draw the lower contours of the wings to get the finished silhouettes. The top corners should be tapered as shown in our sample.
Step 3
We depict radial divergences covering almost the entire surface of the wing. Unpainted should just be the areas similar to the small wings in the middle.
Step 4
You think this is going to be a very difficult period, don’t you? In fact, we only need to sketch the ovals in each line spacing from the previous step. Notice the symmetry as well as the difference in size and shape of these ovals.
Step 5
Repeat the previous step with small changes. We also drew the ovals, but they will be smaller now. Also, these metrics should be directed downwards.
Step 6
Now we are starting the phase in which we will describe the last row of the oval. We should describe the smallest of all the shapes included in our drawing. The oval located on the right side is facing up.
Step 7
In fact, this will be the easiest step of the entire lesson. Here we need to depict smooth curves following the outline of the feather. Only the middle row of fur has no stripes.
Step 8
At this stage, we evaluate the shape of the wings and the symmetry of the model. Compare the segments of each wing and the difference in size. If you don’t see any inaccuracies or errors, you can move on to the next step.
Step 9
Add some color. We decided to choose a light gray color for the outfit. You can choose a different color for these wings if you draw a character with dark or blue wings
Don’t forget to write your wishes in the comments section. When creating new drawing tutorials, we focus on your preferences.


