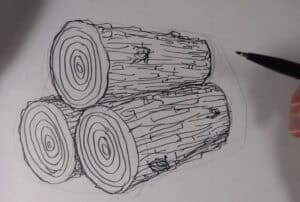
How to Draw Timber with this how-to video and step-by-step drawing instructions. Easy drawing tutorial for beginners and everyone.

Please see Timber drawing tutorial in the video below
This tutorial is for kids and beginners, so I’ve kept it as simple as possible. With the help of the available tutorials, you will learn how to draw wood step by step. The figure shows three records, folded as a slide.
This lesson will require your ability to create smooth circles. The main thing is to make the correct contour of each log and you can easily create the texture of the wood since arbitrary lines are allowed here.
Take your time in the lesson and try to follow each drawing step correctly. For your convenience, there are small hints at each step, use this to get the best results.
Timber Drawing Step by Step
Step 1. Draw the edge of a log.
At this stage, sketch an even oval.
Step 2. Add the edge of the second log.
Below, depict another oval of the same size.
Step 3. Draw the face of the third log.
To do this, you need to draw another oval.
Step 4. Add details.
Draw the bottom and top contours of each record.
Step 5. Add details.
Describe the rest of the contours of each log.
Step 6. Sketch the texture of the wood.
Draw thin horizontal lines of different sizes.
Step 7. Describe the texture of the wood on the cut.
Use thin lines to draw concentric circles over the cut of each log.
Step 8. Check the drawing.
Correct inaccuracies if necessary.
Step 9. Color the wood.
You will need shades of brown.
You can see drawing:


