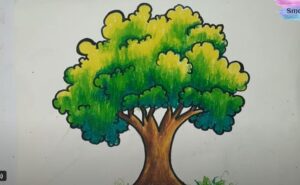
How to Draw a Big Tree with this how-to video and step-by-step drawing instructions. Tree Drawing tutorial for beginners and kids.

Please see Big Tree drawing tutorial in the video below
I am happy to bring to your attention this simple and wonderful drawing lesson in which I want to tell and show you how to draw a big tree step by step. Any novice artist or child can easily cope with the implementation of this lesson. By learning how to draw a large tree with the help of this tutorial, you can draw a wonderful natural landscape by adding plants or other natural objects to your image. You can also supplement your drawing with images of any animal.
Trees are perennials with one or more long branching central shoots. They have strong roots and wide spreading canopy. Trees are very important to human life and occupy an important position in the ecosystem. Plants have different shapes and sizes of leaves that form the crown. Most hardwood trees bear fruit. The fruit may or may not be eaten. The tree is used in industry, urban greening, construction site decoration, landscape design, etc. Hardwoods can be found in any suburban area. The most common are linden, birch, poplar, oak.
While working on this tutorial, you will need to draw some small details, so be careful when doing so. I am sure that you will not have any difficulty completing this tutorial, and enjoy the creative process and achieve excellent results for your work. If you are ready to start drawing a large tree, then grab the necessary drawing tools now and start following this tutorial.
Big Tree Drawing Step by Step
Step 1. Draw the right side of the trunk and some branches.
To complete this step, you need to draw several curves of different lengths and an arc.
Step 2. Draw some branches of the big tree.
Now you need to add some curves of different lengths as shown in the picture.
Step 3. Add the rest of the branches.
Draw curved lines on the left side of the drawing to complete the drawing of the branches.
Step 4. Finish drawing the trunk.
From the end of one of the branches, add a curved line to the right end of the trunk.
Step 5. Start drawing the crown of the big tree.
To complete this step, you need to draw a long wavy line on the drawn branches.
Step 6. Finish drawing the outline of the canopy.
Connect the ends of the drawn wavy line by adding multiple curves of different lengths.
Step 7. Draw the outline of the canopy at the back of the trunk.
Below the tops and between the branches, draw circular and wavy lines of different lengths.
Step 8. Make the canopy more lush.
Inside the previously drawn outline of the canopy, draw curved lines, as shown in the figure.
Step 9. Color the drawing.
To color this large tree, you can use different shades of green as well as brown.
You can see more drawing:


No Responses