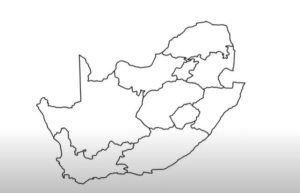
How to draw South Africa (map) with this how-to video and step by step drawing instructions. Easy map drawing tutorial for beginners and all.

Please see the drawing tutorial in the video below
You can refer to the simple step by step drawing guide below
Step 1. Outline the Basic Shape of South Africa:
Begin by drawing a rough outline of South Africa’s overall shape. It resembles a diamond with its southern tip extending into the Indian and Atlantic Oceans. Use a reference map or image to help you outline the shape accurately.
Step 2. Draw the Borders:
South Africa shares borders with several countries, including Namibia, Botswana, Zimbabwe, Mozambique, and Eswatini (formerly Swaziland). Draw these borders as straight lines where applicable and curved lines where they follow natural features such as rivers.
Step 3. Add Internal Borders:
South Africa is divided into nine provinces. Draw these internal borders within the outline of South Africa. The borders between provinces are generally straight lines.
Step 4. Outline Major Geographic Features:
South Africa is known for its diverse geography, including mountains, plateaus, and coastal plains. Add in major geographic features such as the Drakensberg Mountains along the eastern border and the Great Escarpment that runs parallel to the coastline.
Step 5. Label Major Cities and Landmarks:
Add major cities and landmarks to your map, such as Johannesburg, Cape Town, Durban, and Pretoria. You can also label important geographic features such as rivers (e.g., Orange River, Limpopo River), national parks (e.g., Kruger National Park), and mountain ranges.
Step 6. Detailing:
Add additional details to your map, such as rivers, lakes, and national parks. South Africa is home to several prominent rivers, including the Orange River and the Limpopo River. Include these rivers in your map, along with any lakes or reservoirs.
Step 7. Optional:
If desired, you can add color to your map using colored pencils or markers. Use green for vegetation, blue for bodies of water, brown for mountainous areas, and appropriate colors for urban areas.
Step 8. Final Touches:
Review your map and make any necessary adjustments or corrections. Ensure that all labels are clear and legible, and erase any stray lines or smudges.


No Responses