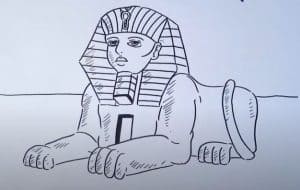
How to Draw the Sphinx easy with this how-to video and step-by-step drawing instructions. Easy drawing tutorial for beginners and kids.

Please see the drawing tutorial in the video below
You can refer to the simple step-by-step drawing guide below
Step 1
Start by sketching the Sphinx’s face. Use curves to outline the face and ears. The inner ear detail has a “3” shaped line. Use curves and straight lines to draw the fake beard.
Step 2
Draw the Sphinx’s hat or crown. Wrap a curved trapezoid on top of the head, noting the curve in the middle. Stick a triangle to each side of the face. Notice that the lower point is replaced with a short line. Draw curves from point to point on the near side of the crown, giving it a three-dimensional shape.
Step 3
Use a series of curves to outline the Sphinx’s forearms and legs. Notice that the overlapping “C” shape of the toes and upper forearm line gives it a muscular look.
Step 4
Draw a rectangle on the Sphinx’s chest. Draw a vertical line on one side of it.
Step 5
Use a variety of curves to outline the forearms and feet. Notice the lines that make the arms appear muscular.
Step 6
Draw a curve and fold it in half to make the Sphinx’s curved tail. Then use the curves to outline the back and buttocks.
Step 7
Use the curves to outline the hind legs and cover the legs by shaping the toes.
Step 8
Draw straight lines across the faces of the crown.
Step 9
Draw a circle inside a circle at the center of the crown, and connect it to the bottom with a pair of short curves. This forms the uraeus, or symbolic cobra. Draw vertical lines on top of the crown. Then use the curves to add detail to the face. Stick the triangles to make the eyes and nose broken, and use short lines to indicate the eyebrows, mouth, and chin.
Step 10
Color your Sphinx. The large Sphinx in Egypt is sandy or light brown.


boo