How to draw super mario run easy with this how-to video and step-by-step drawing instructions. Howto draw cartoons for beginners and everyone.
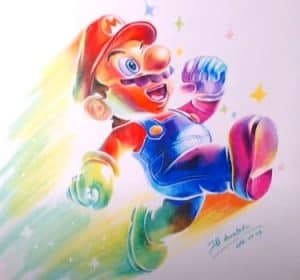
Please see the drawing tutorial in the video below
You can refer to the simple step-by-step drawing guide below
If you are not confident enough to draw as in the video tutorial above, you can do the following:
Part 1
Draw Super Mario characters with a pencil.
Step 1
Start by drawing a curve. This will outline Mario’s face and jaw.
Step 2
Next, draw a circle in the curve of the line. This will form Mario’s nose.
Step 3
Draw Mario’s ears. To do this, draw a curve, almost completing an oval. In the picture, draw two curves, join. These lines detail the folds of the ear.
Step 4
Draw Mario’s mustache. Extend a short curve from each side of the nose. Below this, draw a series of short, connected, curved curves to form a clamshell design. This clamshell line connects the ends of the mustaches.
Step 5
Draw a curve to form the top of the head.
Step 6
Under the chin, draw a big circle. This will form Mario’s body.
Step 7
From neck to circle, draw two sets of parallel, curved lines. Connect each set by drawing two short, straight lines, meeting at a point. You have just drawn the suspects of Mario.
Step 8
Delete the guidelines from the body.
Step 9
Draw a curve connecting the slats and a small circle for the button at the end of each bar.
Step 10
Hand drawing and leg of Mario. On the left side, draw a curve extending from the neck to the middle of the side. On the right, draw a similar line. Then, draw two short curves, connected together to form an elbow. Draw two sets of parallel, curved lines extending downwards.
Step 11
Draw a curve across the left arm to show the curve of the elbow. At the end of each arm, draw a cuff with two curves. Draw another curve horizontally across the abdomen. Then draw a curve from the horizontal line to the bottom of the circle. Connect the ends of the foot line with curves.
Step 12
Delete the guide lines from the picture.
Step 13
Mario’s hand drawing, using the overlapping curves to form each finger.
Step 14
Draw Mario’s shoes. Use a long curve to outline the shoes, perpendicular to the heel. Shoe soles details by drawing curves parallel to the sole.
Step 15
Draw Mario’s hat with two long wavy lines. The brim will extend from the ear to the other side of the head. The top of the hat will extend from the ears to the far end of the first line, along with the shape.
Step 16
Draw Mario’s other ears by surrounding an oval, using a curve. Add details to your ears by drawing a small curve. Draw another curve around the top of the hat and a few short curves so that the hair is near the first ear.
Step 17
Draw a curve from the brim and attach a circle above the line. In the circle, draw an “M” for Mario. Draw a little more hair on the back of the head with a wavy line and connect the hanging cord to the hand with a short curve.
Step 18
Draw a “U” line below the mustache to form the mouth. Draw an oval for the eyes, and a curved shape above each shape to represent the eyebrows.
Step 19
Use the curves in your mouth to point your tongue and teeth. Draw an oval in an oval in each eye, making the shadow smaller.
Part 2
Coloring for Mario, the coloring steps are as in the tutorial video. You need to perform meticulously and carefully to get a perfect picture.
