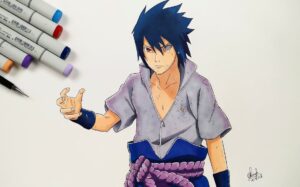
How to Draw Sasuke Uchiha From Naruto with this how-to video and step-by-step drawing instructions. Naruto character drawing for beginners and everyone.

Please see Sasuke Uchiha From Naruto drawing tutorial in the video below
Sasuke Uchiha From Naruto Drawing step by step
Step 1
In the first step on how to draw Sasuke, you will draw out the paths and shapes to form a solid frame for him. Start with a circle for the head and then some circles for his joints. The head part is somewhat complicated because of his hairline. When I first started drawing Sasuke, I drew his hairline wrong. So I had to do it again. Now continue drawing his legs, feet and hands. For the hands start with the glove shape. His feet will just need a sock-like shape. I chose to use this awesome action pose of Naruto because this is the pose Sasuke takes when fighting and throwing ninja stars. I remember one of the Naruto episodes when Sasuke fought Kakashi. I think he’s training Sasuke how to fight better. I barely remember because I watched it a while ago. Anyway, to make it easier to draw the body details, let’s sketch out the rough shape of Naruto’s character. When I say this, I want to draw legs and arms like mannequins. To make drawing your face a little easier, let’s add four guides to balance your face.
Step 2
In this step we will start adding the precise details of the clothes and face. When drawing clothes, you have to make sure that you add small folds to them. You cannot have a shirt without ruffles, otherwise it will look impractical and monotonous. In this image, we will make the clothes fly vertically because Sasuke is in the air. Start shaping your hands beautifully. For as long as I can remember, I’ve been terrible at using my hands. Now that I practice they go very well. Anyway, let’s start drawing the pointed shape of the ninja star. For this pose, make sure you extend your arms away. This will create a vibrant and excellent pose for your Naruto character. Next step okay??
Step 3
Correct! Are you ready for this step?? To start, we’ll draw a jagged shape on one side of Sasuke’s hair. Since his head is in the 3/4 position, you will be able to see the right half of his hair. Remember, you cannot have a 3/4 face and keep your hair at the back of your head. This will make your character appear distorted and unbalanced. To finish off this step, draw some other ruffles and folds on the garment. Let’s take the next step, kids! We don’t want Sasuke to be unfinished!
Step 4
In this easy Sasuke step, we’ll start by drawing the cloth wrapped below his knees. Honestly, I don’t know what that wrapping means, but I guess it’s what all ninjas wore back then. But yeah, continuing with the Naruto character. Add some folds in the clothes too. As you can see Sasuke’s belly is exposed, that’s because he is in the air and since he can jump 30 feet in the air you will be able to see part of his belly due to the speed at which he he is moving. Guess that’s the step…continue ^_^
Step 5
All I can say about this step is that it’s really easy. We just have to add some ruffled details and some hair. All we did was add a thigh warmer to hold some sort of external pocket. Don’t forget to create warmer wraps for his arms. To finish off the rest of this step, draw the inside lining of his hand. And finally, draw a last bit of spikes at the ends of the hair. Well, I guess this is the end of the tutorial. Continuing with the awesome Sasuke line art =3
Step 6
Hello again, here is the finished artwork. This is what you should end up with. I think Sasuke is mad at me for drawing him a thousand feet high XD. Don’t hurt me with your ninja star *die*!! Well, Sasuke will have a nice fall from the sky. I think I better leave now, I don’t want to die young!! That concludes the step-by-step guide on how to draw Sasuke from Naruto. I guess this is goodbye young people!
You can see more Naruto character drawing:


