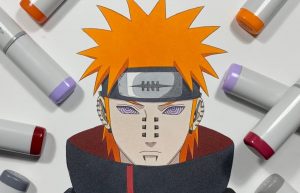
How to Draw Pain from Naruto easy with this how-to video and step-by-step drawing instructions. Cartoon drawing tutorials for begi nners and all.
Please see the drawing tutorial in the video below
You can refer to the simple step-by-step drawing guide below
Step 1
Like with all the other Naruto characters I’ve drawn, you’ll start the same way. Draw a circle for the head and then add guide lines on the face. You will then draw the entire outline of Pain’s Akatsuki cloak. Once done, draw the shapes for his legs and feet.
Step 2
You’ll draw the collar in more detail and then outline the pointed outline shape for his hairstyle. Next, draw the head guard and then outline the shape of his face as you see here.
Step 3
You will now start drawing out the design on his head protector as you see here and then outline the shape of his eyes in full. Fill in the pupil and then draw the nose. You would then outline the shape of his sleeve and then draw a zipper or closer line for the cape.
Step 4
You’ve reached step four and you’ll now begin to sketch the rest of the flowing shape of Pain’s Akatsuki cloak. Once done, you can draw in two of Akatsuki’s cloud designs and then sketch out the shape of his legs as you see here.
Step 5
You have reached your final drawing step and all you need to do now is draw the shape of his legs and then his feet. As you draw the legs and feet, remember to add detail and definition. Finally, draw another Akatsuki cloud in the center of his cape as you see here. Once done, you can start erasing all the principles and shapes that you drew in step one.
Step 6
You just finished the tutorial “how to draw Pain from Naruto step by step”. Color him and you’re done. Join me again for more drawing fun.
