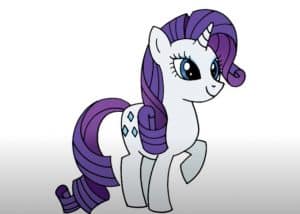
How to draw rarity from my little pony easy with this how-to video and step-by-step drawing instructions. How to draw cartoons for beginers and kids.

Please see the drawing tutorial in the video below
You can refer to the simple step-by-step drawing guide below
Step 1
First thing, let’s first draw a circle, as a guide for the first part.
Step 2
Under the circle from the previous step, draw an oval. It will be Rarity’s body.
Step 3
Now, using two curves, connect the head to the body of Rarity.
Step 4
Use an elongated oval to outline the horse’s limbs, as in our example.
Step 5
Draw lines of symmetry on the face. The vertical line shows us the center of the face, and the horizontal line helps us draw the eyes.
Step 6
Continue the lesson on how to draw Rarity step by step. Using symmetrical lines on the face, draw the eyes and nose like in our example below,
Step 7
Use two curved lines to draw half-closed eyelids. Draw the pupil inside the eye.
Step 8
Draw the mouth, horns, and ears, as shown in the example below.
Step 9
In this step in the lesson on how to draw Rarity, we just need to draw the hair, using a few curves.
Step 10
Continue drawing ponies. Delete the rules from the previous steps. Circle the lines to make them smooth and clean.
Step 11
Draw pupils. Draw the mane, using curved lines. Draw the legs, that’s behind it all.
Step 12
Continue drawing My Little Pony. Remove guidelines from Rarity’s body of content. Circle the lines as in our example.
Step 13
Draw the tail, very similar to a ribbon for wrapping presents.
Step 14
Draw three diamonds on Rarity’s hip. Use long, smooth lines to draw texture on the horse’s hair and tail.
It’s a drawing lesson on how to draw Rarity from My Little Pony. If this tutorial is interesting to you, subscribe to Google + and our other social networks. Stay tuned and look forward to new drawing lessons!


