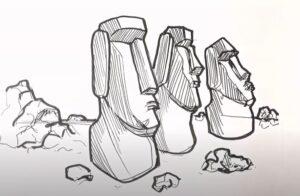
How to Draw Moai with this how-to video and step by step drawing instructions. Beginners will benefit from this simple step by step lesson for learning how to draw the famous heads of Easter Island. This easy Moai lesson is perfect for younger children looking to get started with drawing.

Please see Moai drawing tutorial in the video below
You can refer to Moai simple step by step drawing guide below
Step 1. Sketch the head
Begin by drawing the head shape of the Moai statues by creating rectangle-like outlines.
Step 2. Attach the ears
Now, attach the ears by drawing a curved shape on either side of each statue’s head.
Step 3. Draw the face
To form the statue’s face, draw a curved downward line for the forehead and mouth. Then add the wavy outline of the nose to the middle.
Step 4. Form the body
Form the shape of the statue’s torso connecting to the lower part of the head..
Step 5. Add grass
Draw sharp curved lines to outline the grass around the base of the statue.
Step 6. Complete the Moai drawing
Now, grab your colored pencils and color our Moai drawing! First, color the statues with light shades of blue, purple, and red. Add some shadow to the face using a darker gray. Then, paint the sky with a light blue pencil and the lawn with a green pencil.
You can see more drawings:


